Quick Links:
Zen
and Art Home Disclaimer
Errata
Parts and Parts
Vendors
Truck Sales Service
and Repairs
Engine Fuel Hydraulics Radiator and Cooling
Air System Brakes Wheels Tires Electrical
and Batteries
Transmission Clutch
Axles Hubs Body Air
Conditioning
Tools
Safety
Axles
When I bought my Unimog model 1300L, it had had a hard life. My unit was not an ex-military truck, but rather had seen civilian service as an off road cargo hauler (explosives and seismophones for a geophysical exploration company). One of the previous owners, of which there were at least 3, "submarined" the truck and got water in the portal axles and drive line. After sitting for extended periods, the rust finally took it's toll. Eventually, the wear and rust pitting got so bad that the truck would grind as you drove it at low speed. Of course, you could only hear it at low speed due to the tire noise. The damage was building and eventually, it would have to be replaced. One other issue bothered me and that was the truck's inability to hit 60 mph due to low gearing. The plan was to kill 2 birds with one stone. Master mechanic Kai Serrano would replace the ring and pinon gears and we would replace them with a higher ratio, thereby giving me additional top end. It was a good plan, although the gear sets were viciously expensive ($3K a pair or something obscene like that). And of course, you need new bearings, seals, etc so the actual price was much, much higher. The photos below describe the process of changing the gears and detail the intense damage that was present in the rear gear set and hubs.
To insure that you don't have to suffer this kind cost or effort, there are a number of maintenance items that you should do. First, on both differentials, you should change the oil yearly or if you go through deep water whichever comes first. Normal 80W gear oil will do the job, but you can use multi-viscosity and synthetic oils if you so choose. The maintenance actions for the hubs are covered in the Hub section of this set of pages.
For the differential locks, the shop manual calls for removing the banjo air fitting on the top of the axle housing and filling with about a shot glass full of anti-rust oil. I use regular air tool oil you get at Home Depot and it works fine. You should do this every year and be sure to cycle the locks several times to spread the oil around after the fitting is tight.
The
axles and
torque tubes
on the mog are
sealed to
prevent
contamination.
This sword
cuts both
ways; if water
or dirt gets
inside, it
cannot get
out. When
we did the
rebuild, Kai
added a drain
plug on the
rear torque
tube to allow
draining
excess "stuff"
that might
accumulate
there during
operation.
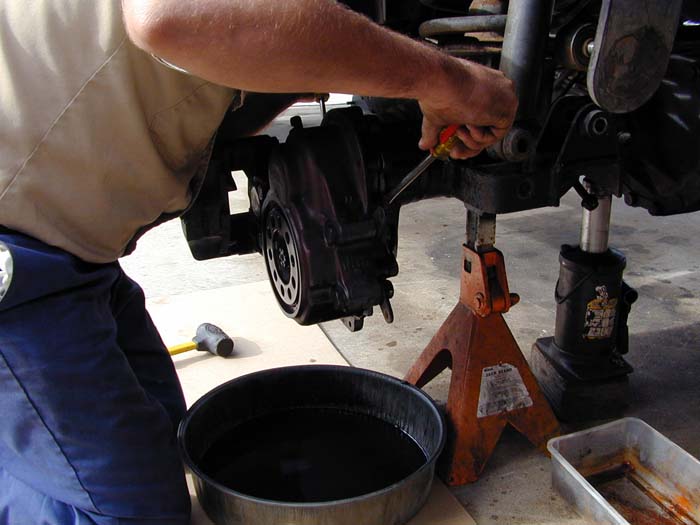
Removing the wheel hub and draining the oil in the hub.
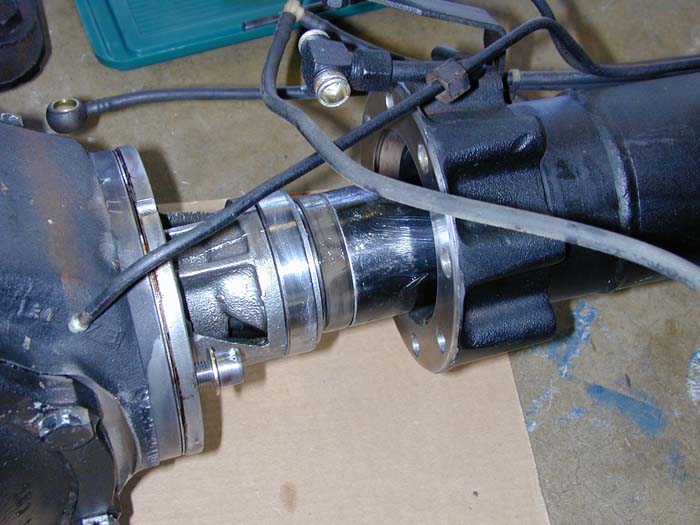
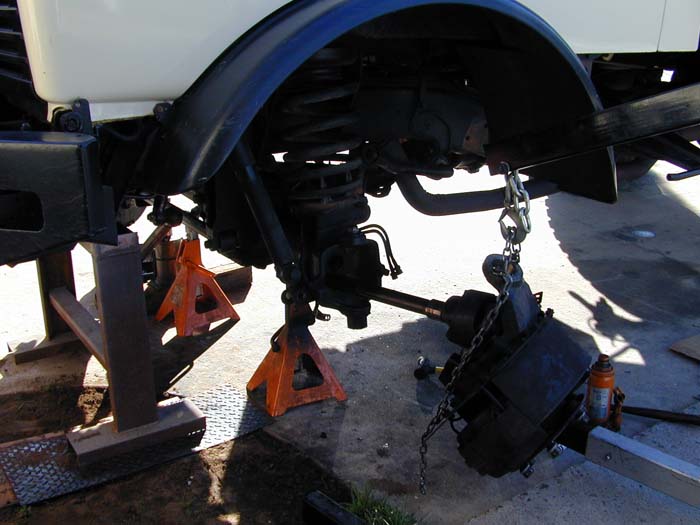
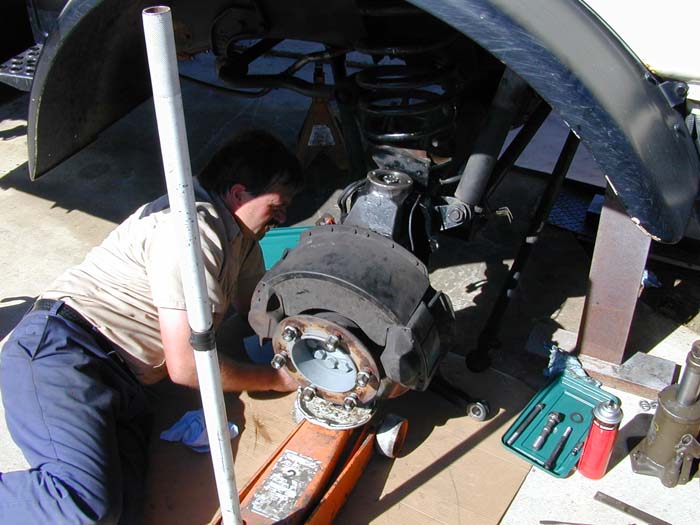
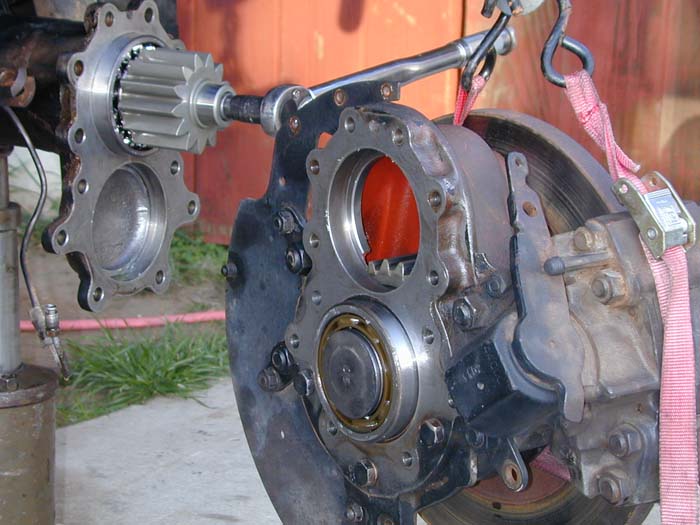
Separating the axle/torque tube assembly from the transmission.
Torque tube housing separated from the transmission housing. Note joint in center.
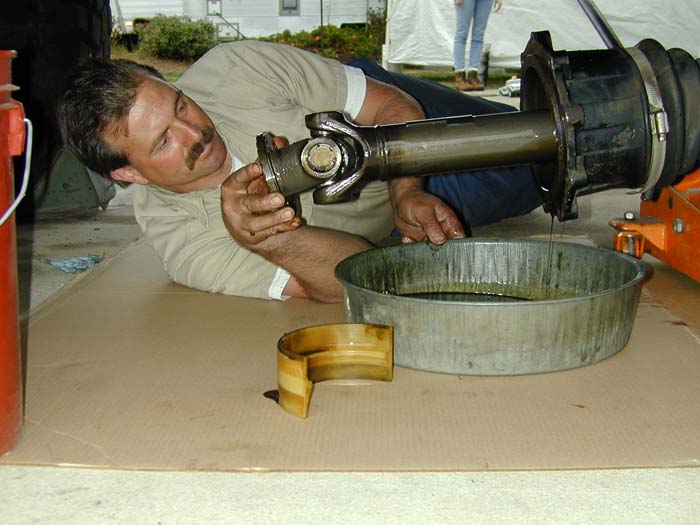
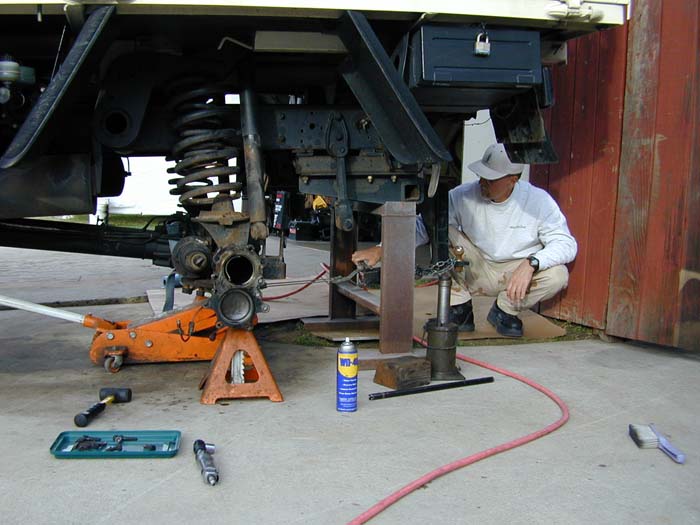
Kai removes drive shaft from torque tube with pan to catch oil.
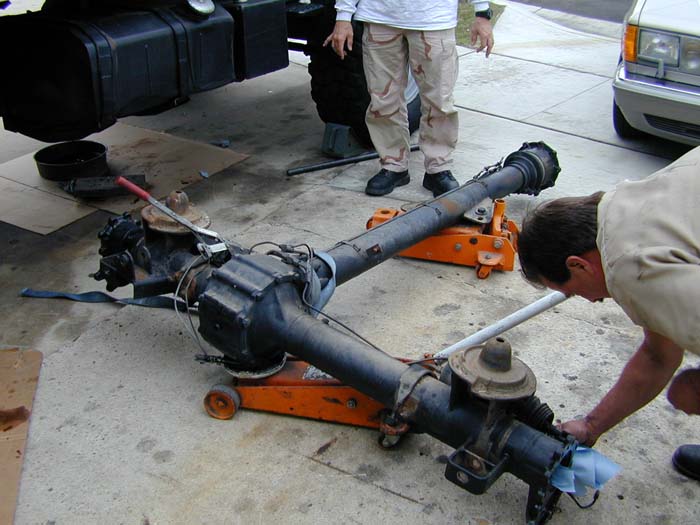
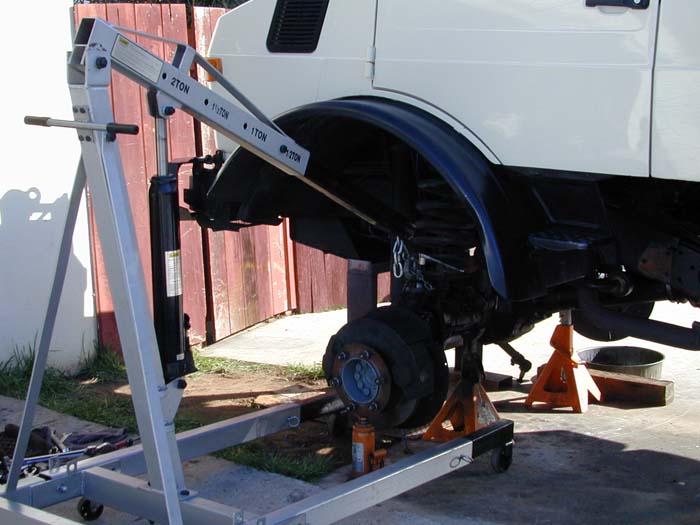
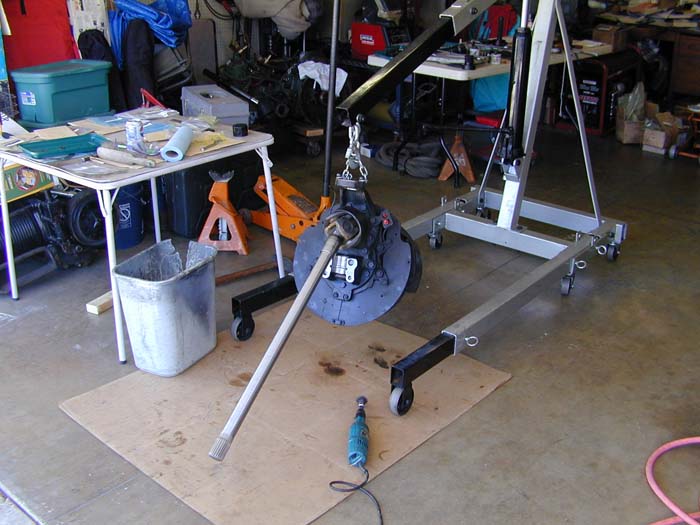
Unit fully separated from truck. This is a
good time to do a close physical inspection of the rear springs and
measure their heights to see if they need replacement.
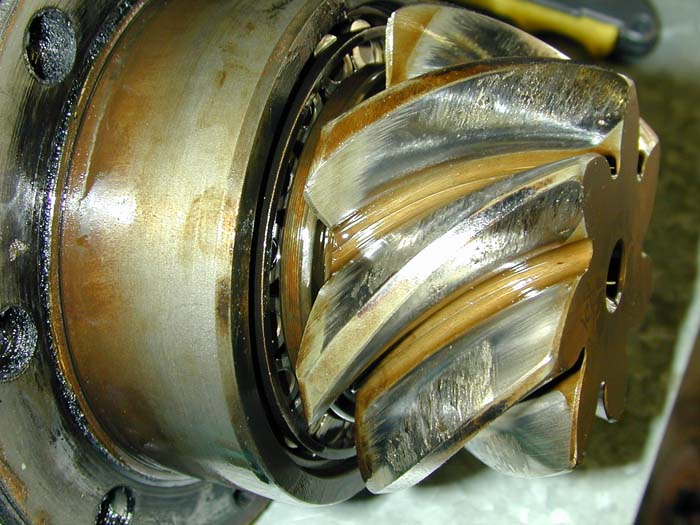
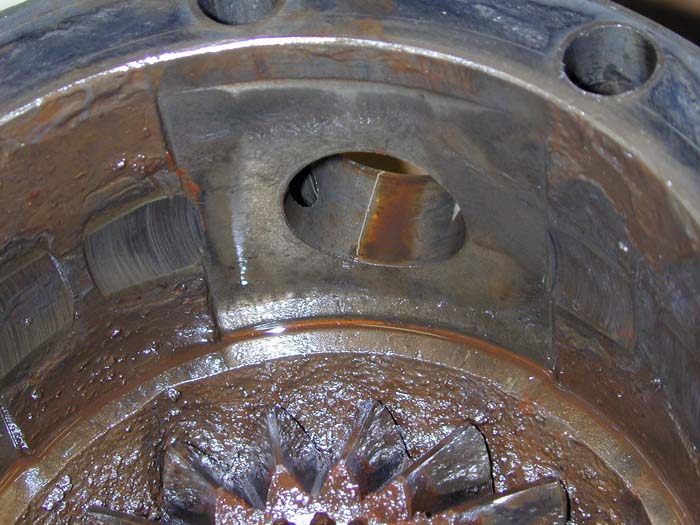
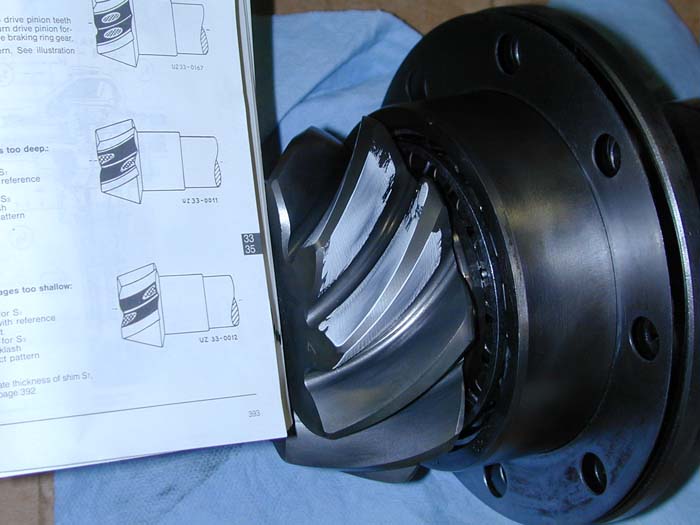
Note the severe scarring on the
pinion. These were deep. This part needed to be replaced.
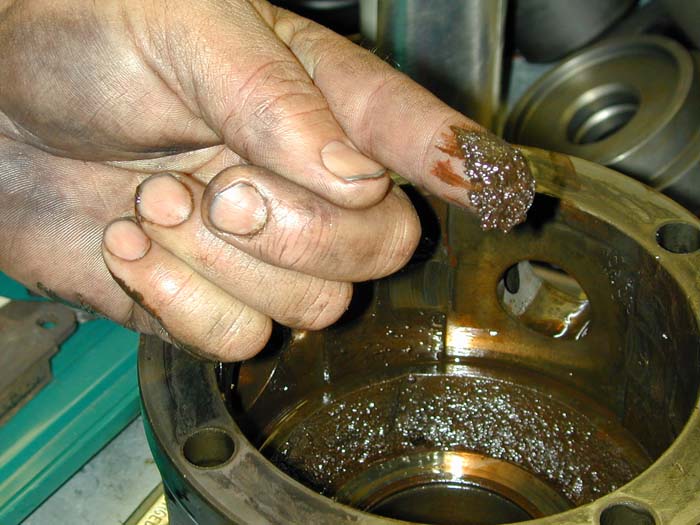
The oil had turned to peanut butter,
probably from the heat of friction. This contamination also caused the
differential locks to stop working correctly.
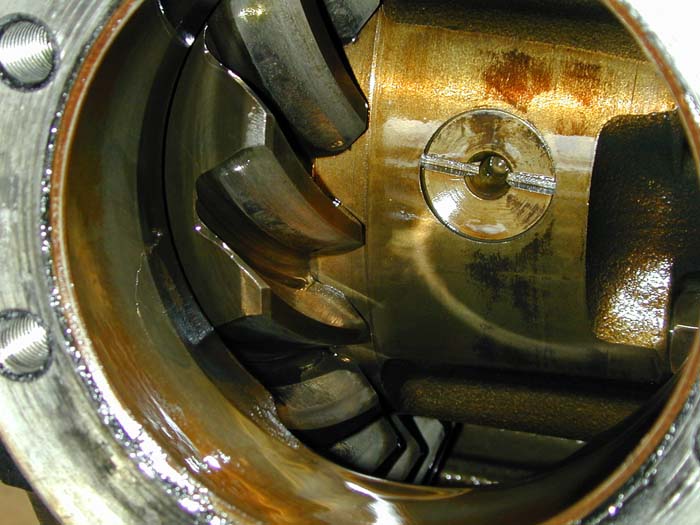
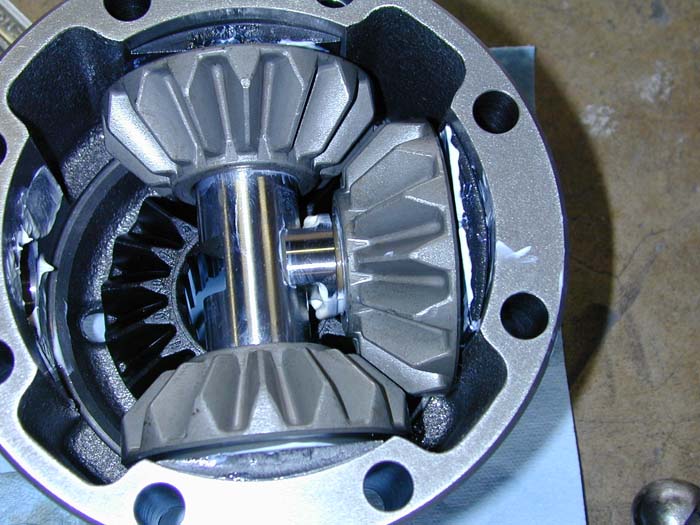
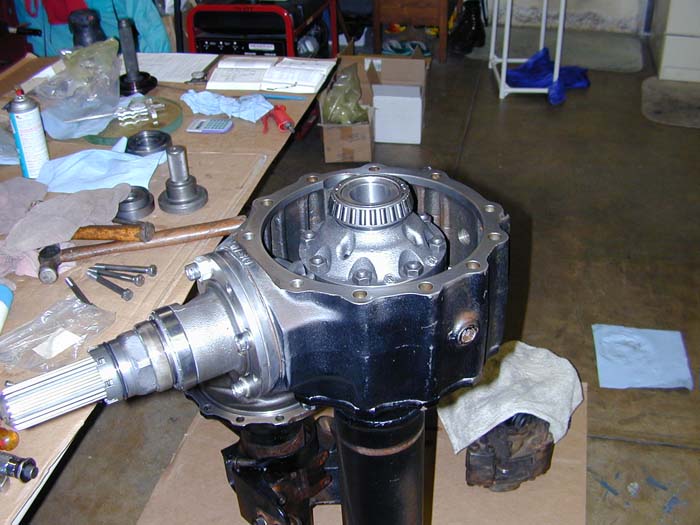
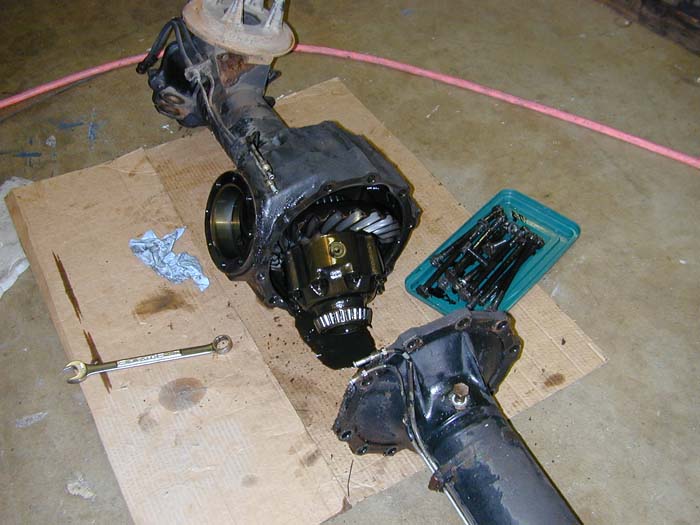
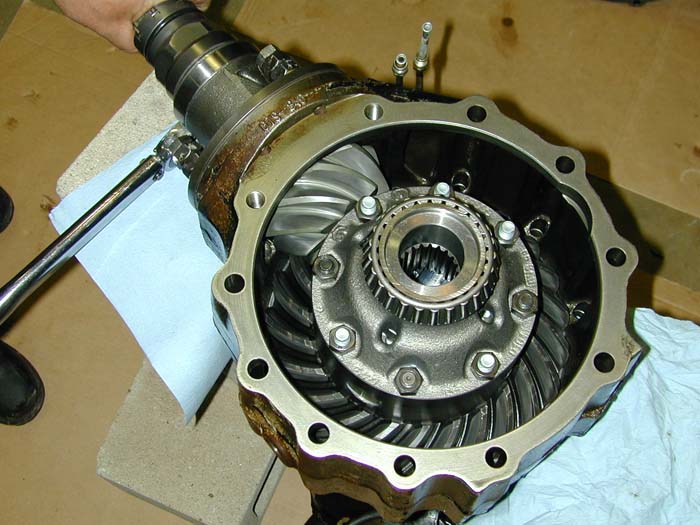
Looking into differential pumpkin: note scarring on the gear faces.
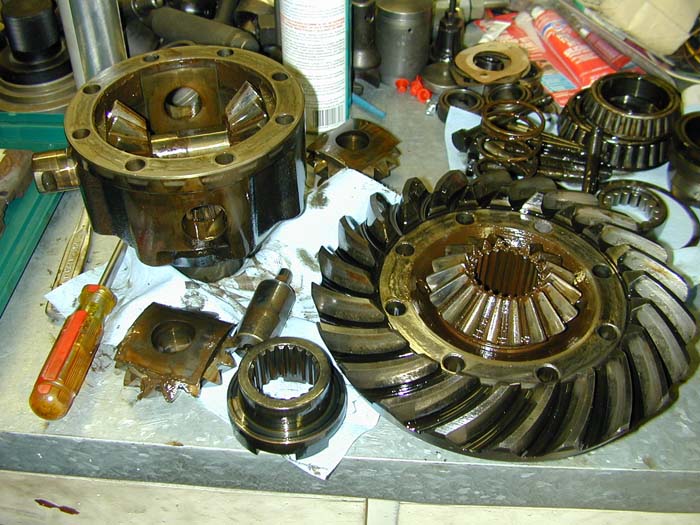
Dirty, damaged parts. The whole thing is hosed.
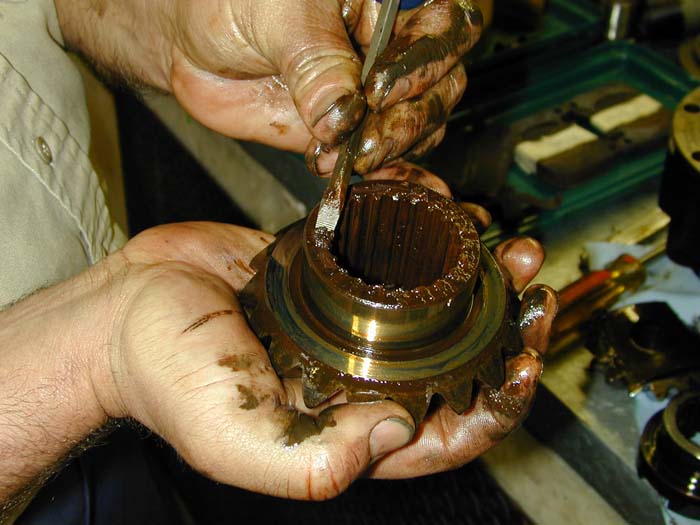
Trying to remove the grease from the parts, it was so thick you had to chip it off.
Inside the gear housing, more peanut butter.

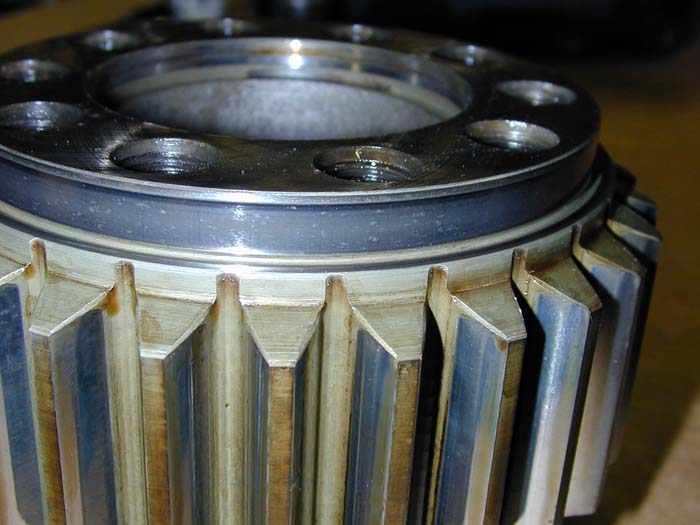
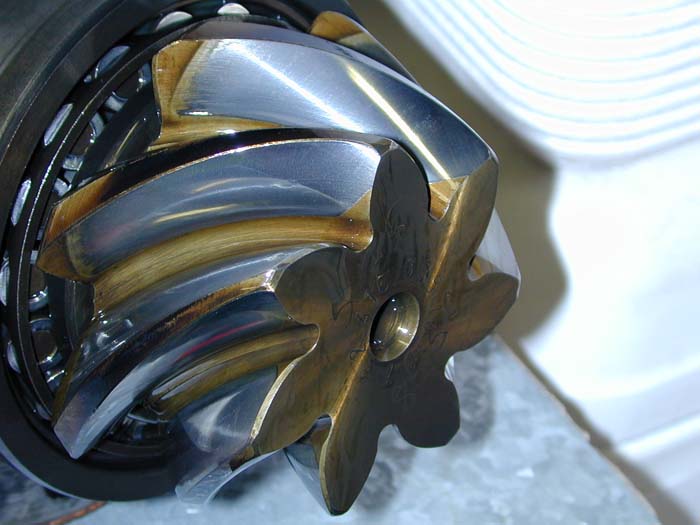
New ring and pinion. These are a matched set.
Note damaged inside housing from wearing gears.
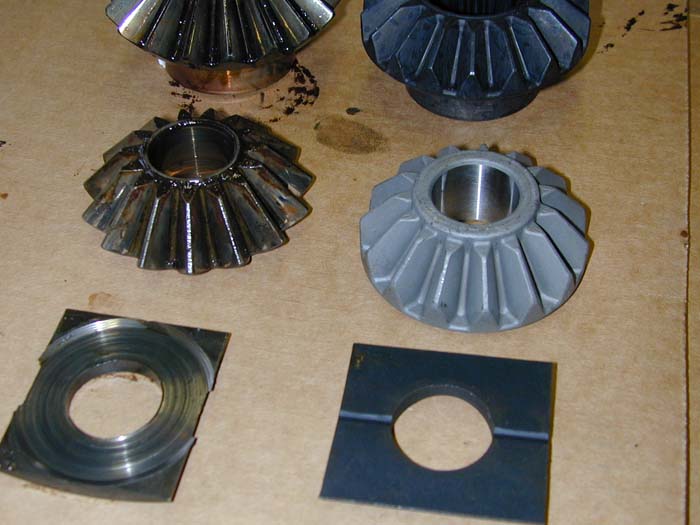
Old versus new spider gears. Note deeply grooved end plate.
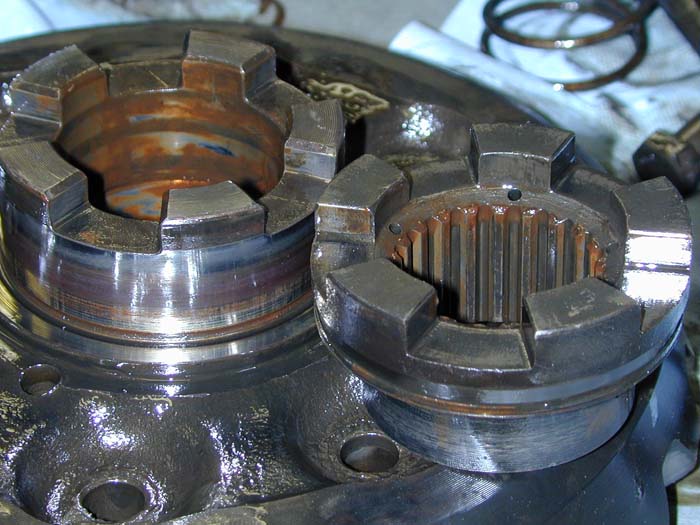
Dogs on the diff-lock. These are
deep and strong and are actuated by the mog's compressed air system
via a piston in the differential. If the seals on
the differential get dry, the differential locks may not
engage. This did, in one case, strand us on a really tough
trail in Moab, UT. Once the seal failed,
I could only operate the diff locks for about 5 seconds
before it fully drained the air tank and engaged the
parking brakes.
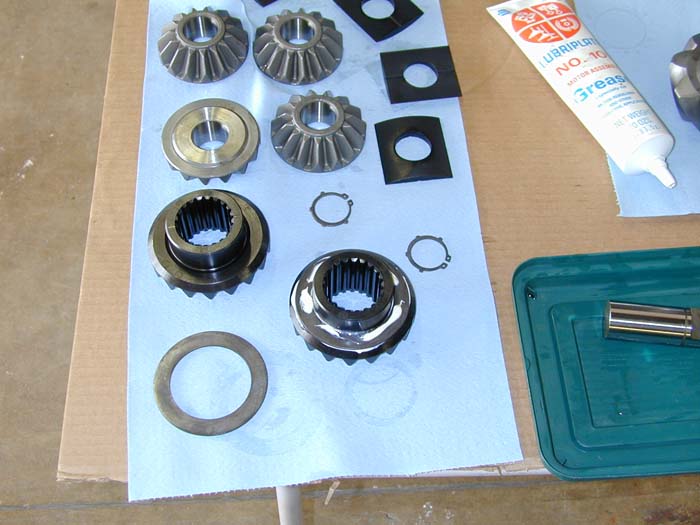
New, clean parts ready to be installed.
Carrier and associated parts.
3 of four spider gears in place.
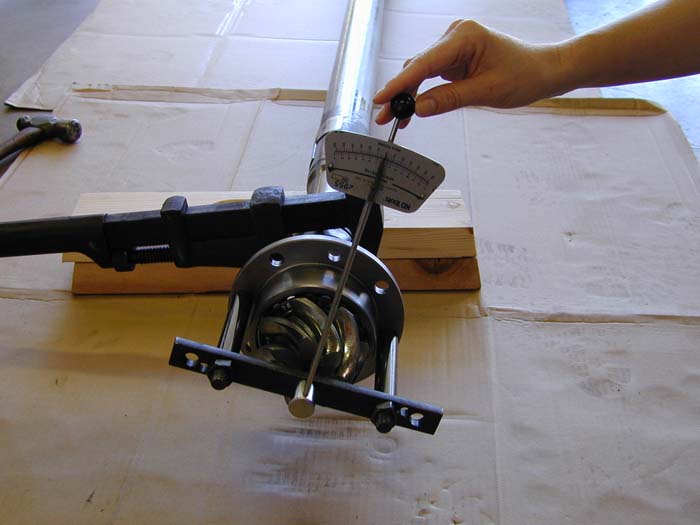
Checking the pre-load on the bearings .
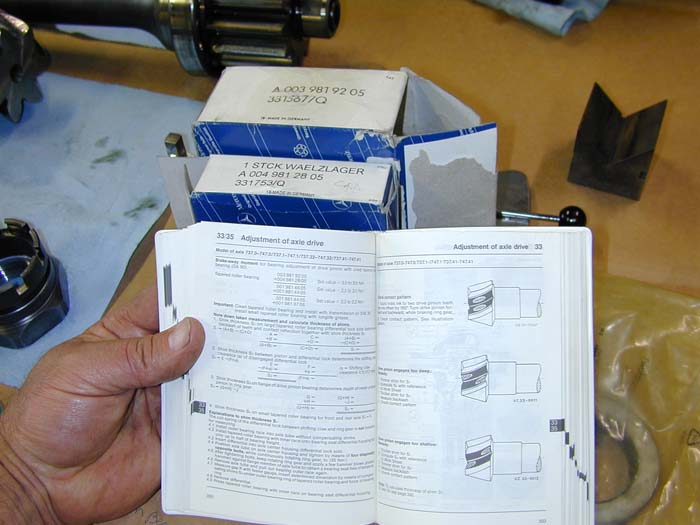
Checking the unimog manual for specification information on gear alignment.
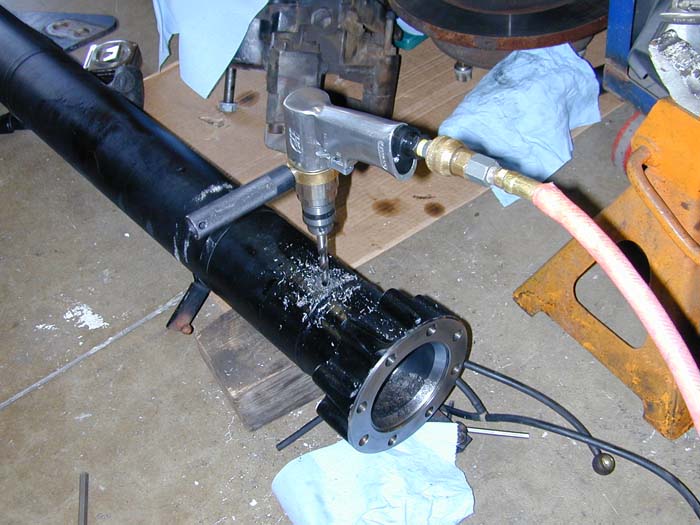
Installing drain plug on torque tube to prevent accumulation of contaminants from happening again.
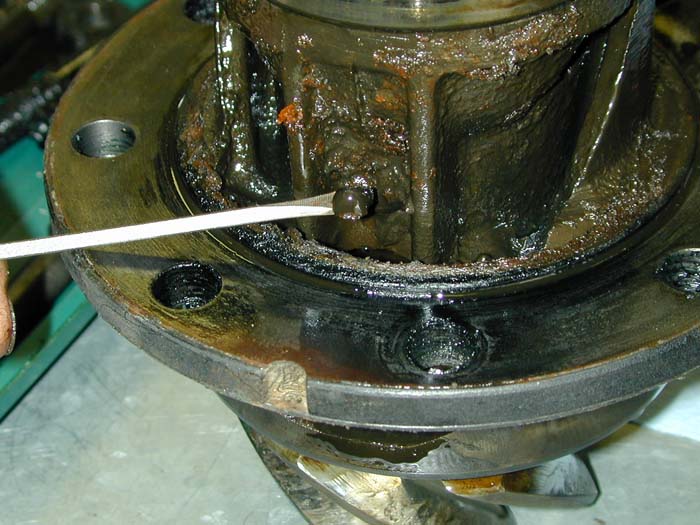
While the axle and hubs were off, we inspected them for damage. There was no shortage of damage. Note the wear groove in the bearing race. This gear is hose and was replaced.
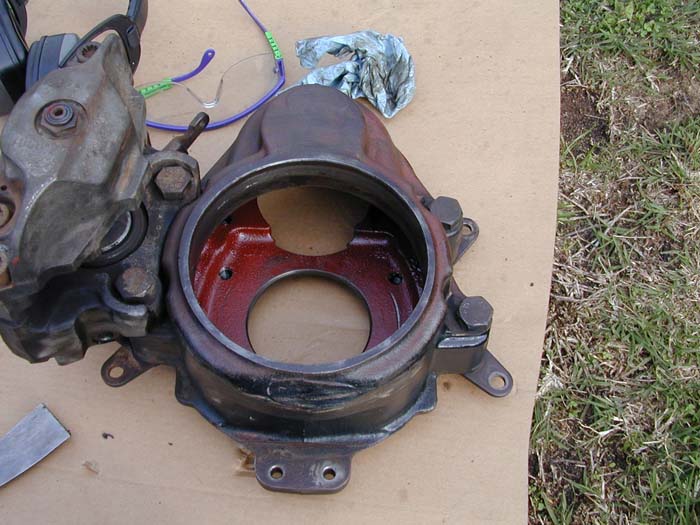
The worn bearing race allowed the wheel to
droop cutting path in the housing on right. But, in
this case, the housing was serviceable.
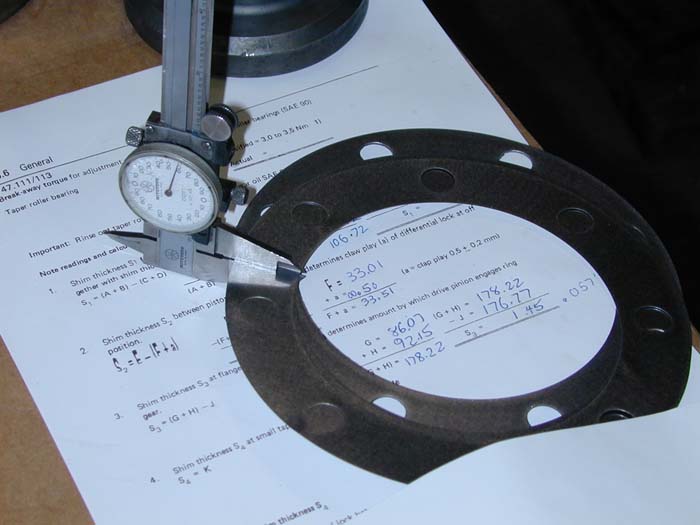
Worksheet from the shop manual for checking the depth of the pinion gear in the housing.
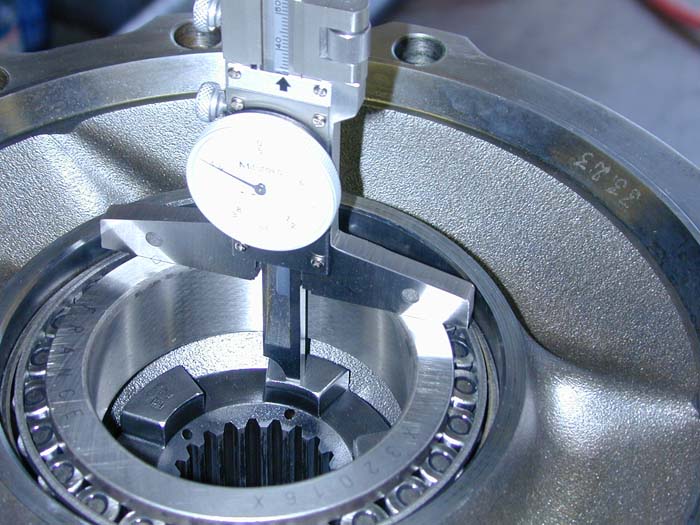
Insuring the depth of the bearings.
Finished assembly, ready for checking.
Checking the "gear wipe pattern" with white marking grease. Note the black stripe in the white area, this is the actual contact zone. This one is per the specifications and the manual examples.
Using feeler guage to measure gear
depths. The wheel gear was used in the hydraulic
press to distribute the load when pressing in the
bearings.
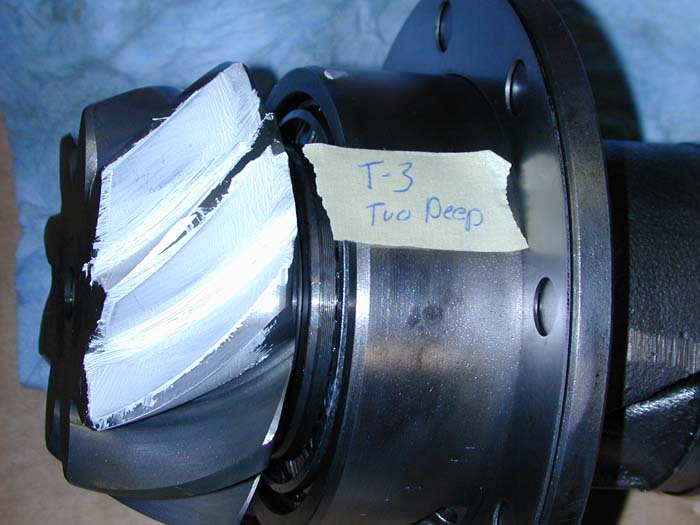
Rechecking the seating. Too deep.
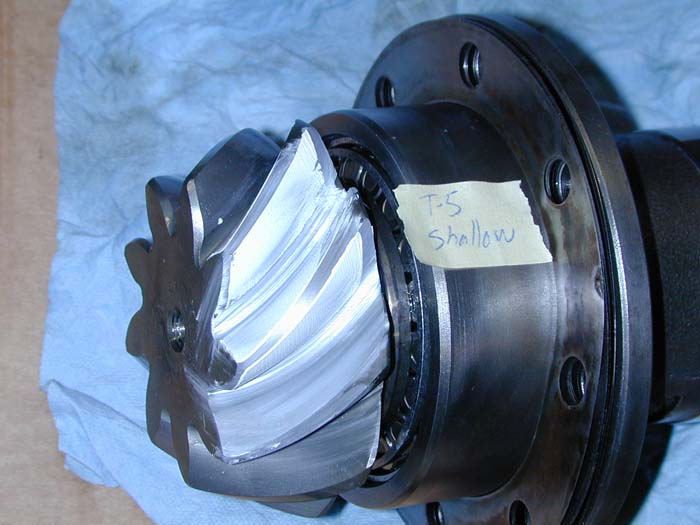
This one is too shallow.
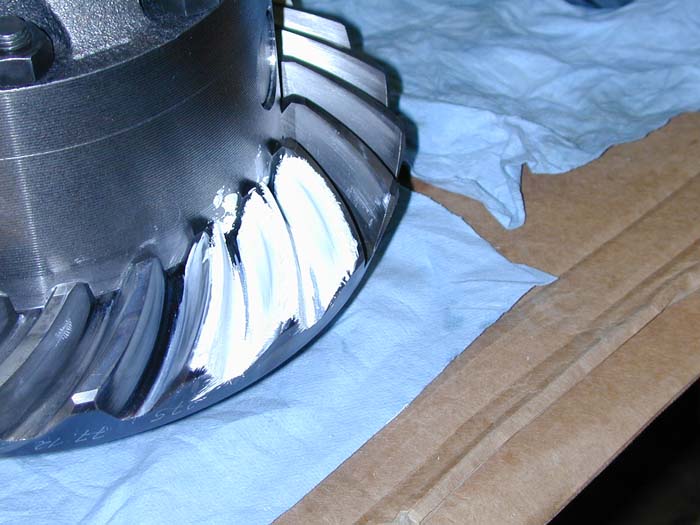
Wipe pattern on the ring gear. Right in the center.

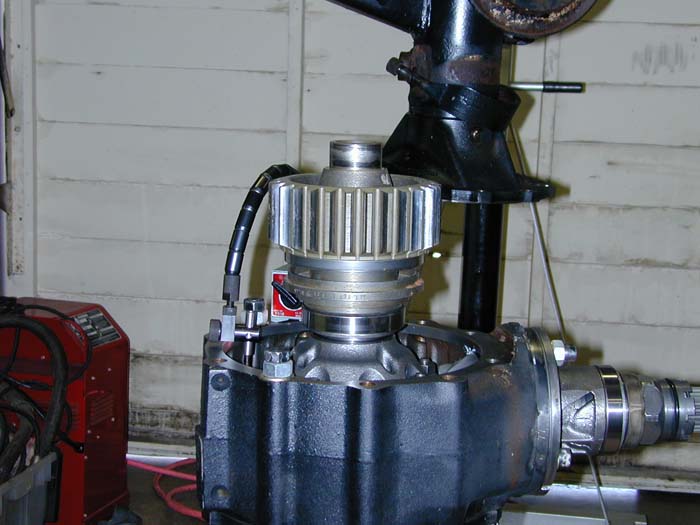
Using assembly tool to protect spline ends of unit before inserting into the torque tube.
Insertion of assembly into torque tube nearly complete.
After that much fun on the rear, the only thing to do is the front.
Disassembly of the front is a much bigger deal due to the steering.
This is the used front pinion -- note the smooth polish as opposed to the scarring on the rear pinion.
Dis-assembly of the front differential.
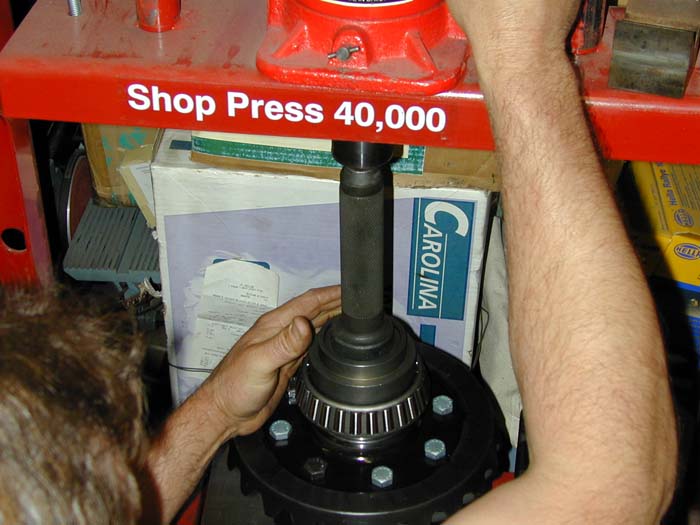
Using the press to reassemble the
unit. The knurled black item is a special Mercedes
tool used to
seat the bearings.
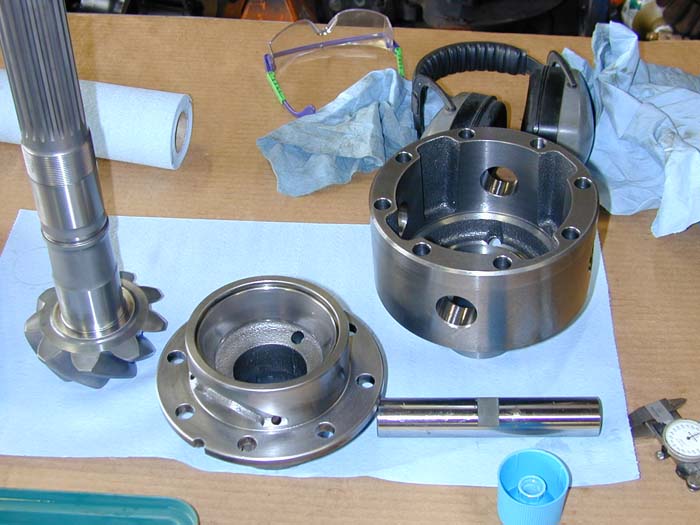
Front unit ready for checking.
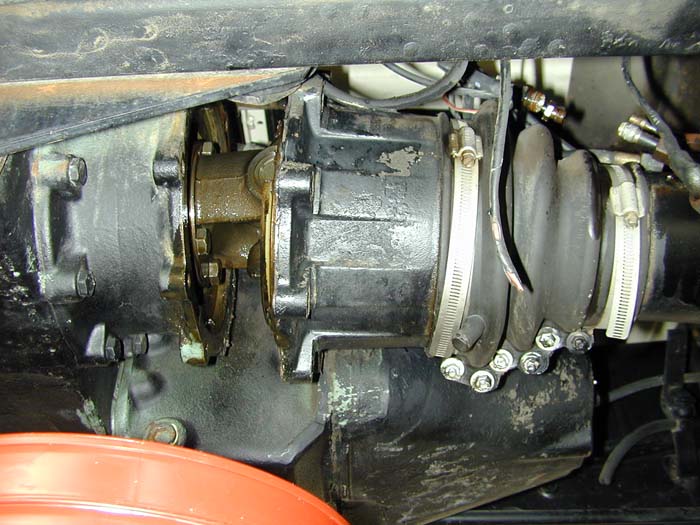
Completed front hub unit with drive shaft.
Completing installation of the hub unit.
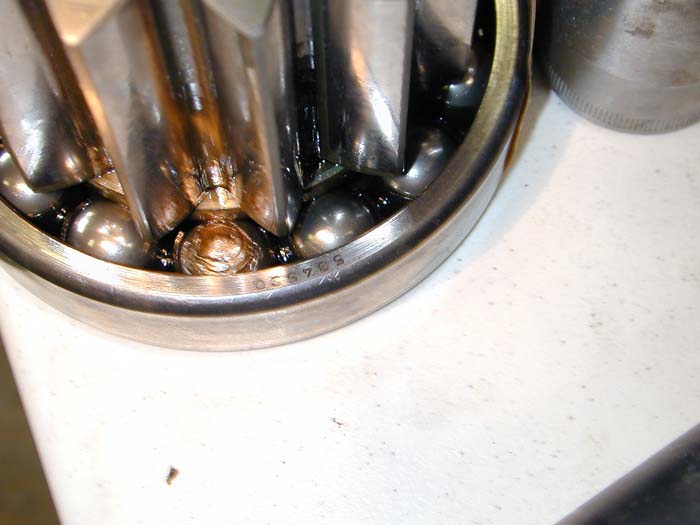
Inspecting wheel gear bearings. One of the balls was trashed (bottom center).
Final hub assembly ready for
installation. Clean and pretty. You can tell
this is a rear hub from the lever on the parking brake.
The finished product.
This was a ton of work spanning many weeks and many, many thousands of dollars of parts and labor. Kai did a great job and the repair is still in service today. This sort of thing is not for the feint of heart or checkbook. The best thing to do is to stay in front of the maintenance burden and avoid the issues all together.
Quick Links:
Zen
and Art Home Disclaimer
Errata Parts and Parts
Vendors
Truck Sales Service
and Repairs
Engine Fuel Hydraulics Radiator and Cooling
Air System Brakes Wheels Tires Electrical
and Batteries