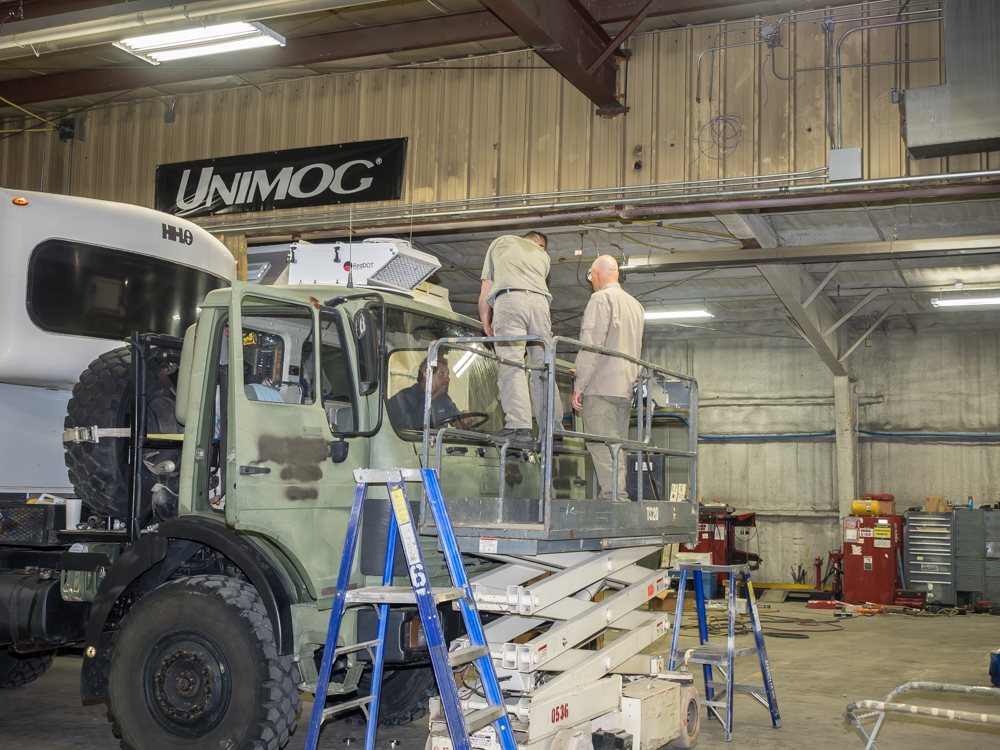
We completed the addition of the
turbocharger and intercooler. Additionally, the windshield
was replaced. All of these actions were to be performed at Rob
Pickering's shop in La Junta, CO.
Once
the enhancement and maintenance actions were complete, we headed
north toward Colorado Springs, then Denver. But, when we
got to Denver, we encountered a brake lockup that stuck us in
the Jefferson County Fairgrounds parking lot for 3 nights.
The photos below are what we saw.
The
mounting frame for the intercooler was test-fit on the headboard
to insure there were no interferences with the existing
components.
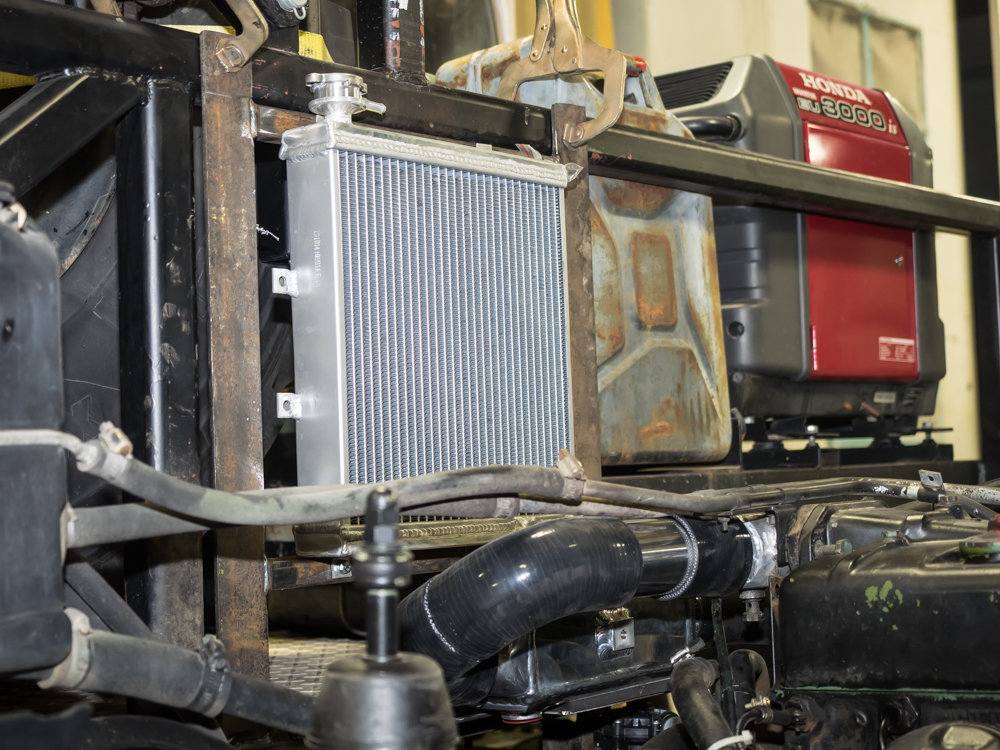
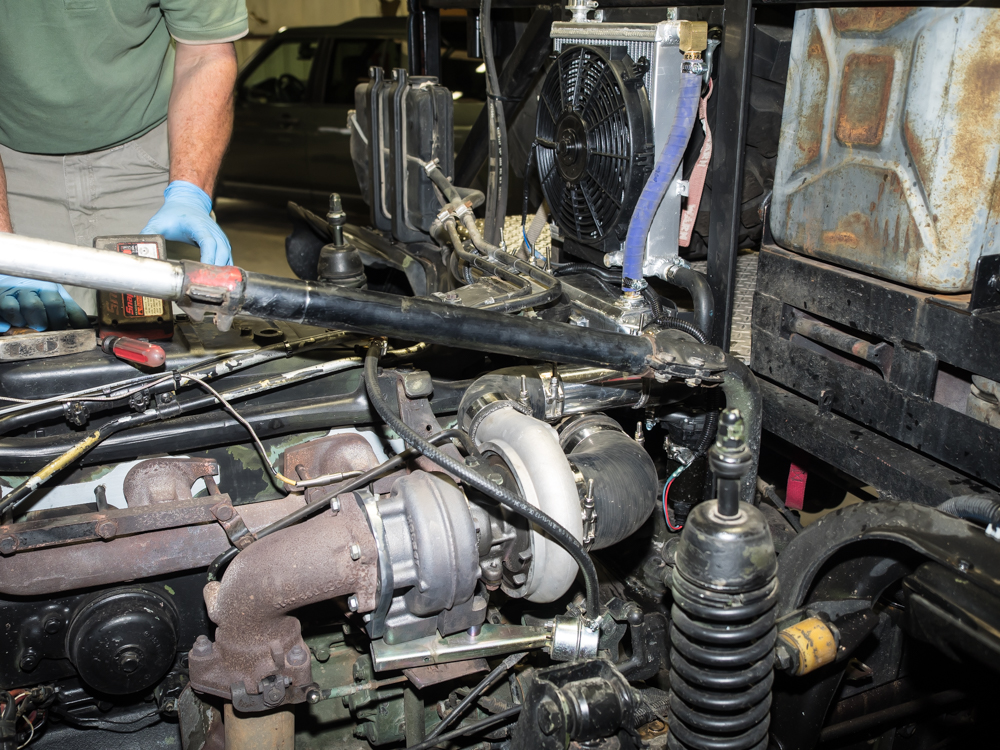
Visible
in the photo above is the intercooler radiator, intercooler,
ducting and the new HX-35 Holset turbocharger.
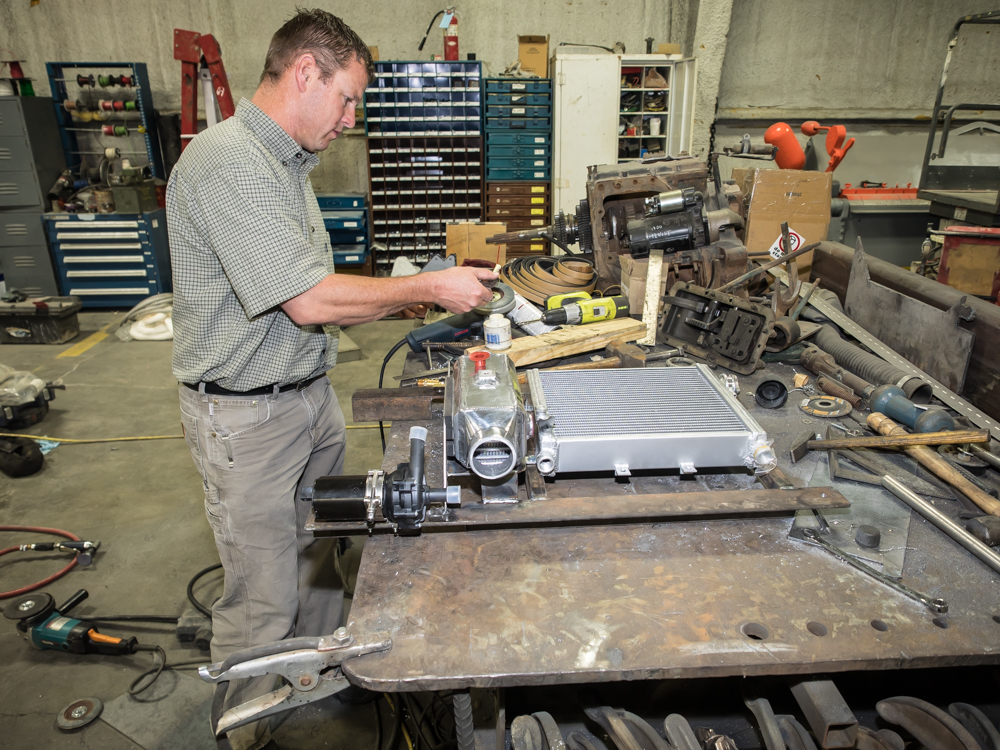
Finishing
touches are put on the assembly before it is torn down to be
painted.
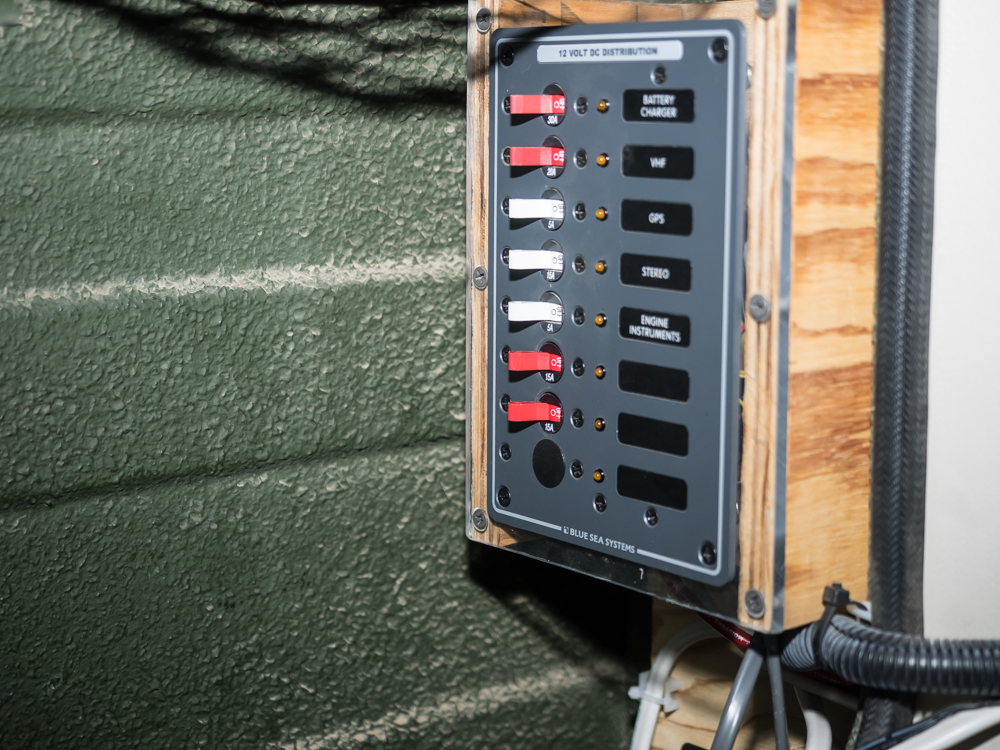
While
the paint was drying, we added two additional circuits to the
12VDC breaker panel: radiator fan and intercooler water pump.
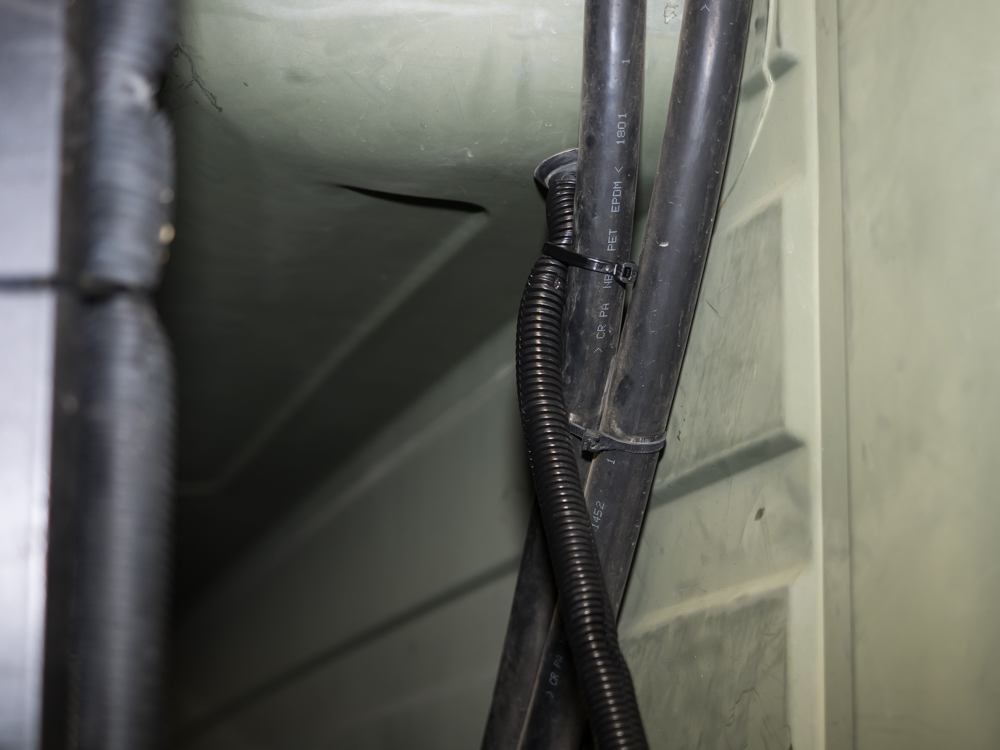
12VDC
supply lines were placed into loom and run from inside the cab's
cargo bubble along the air conditioning lines.
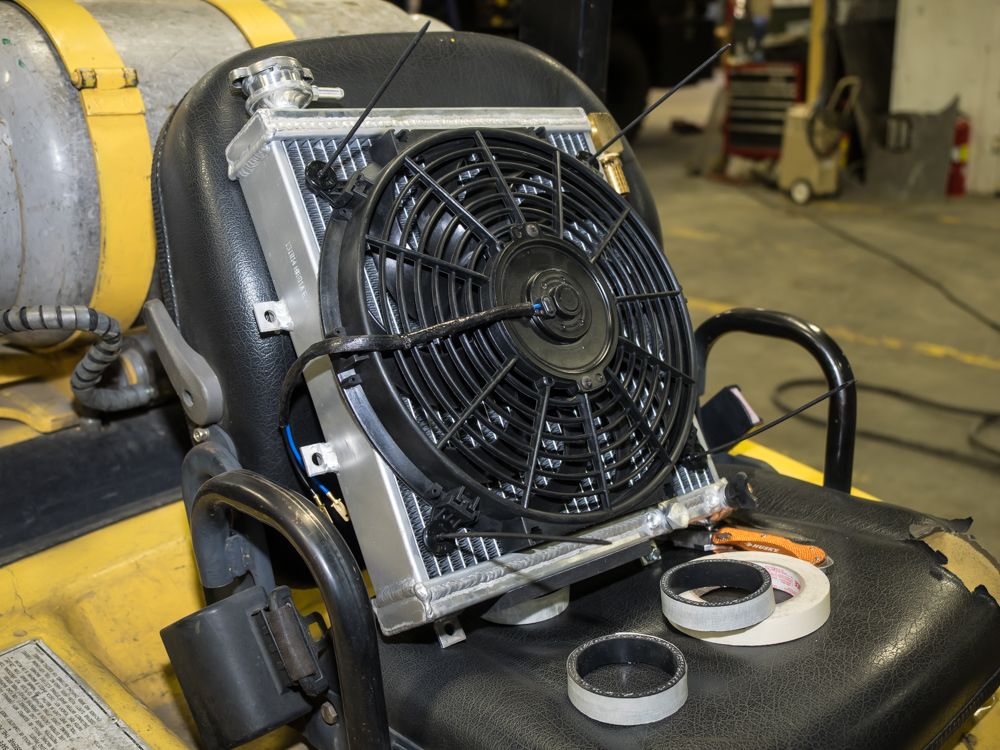
Electric
fan was attached to radiator prior to installation in newly
painted mounting frame.
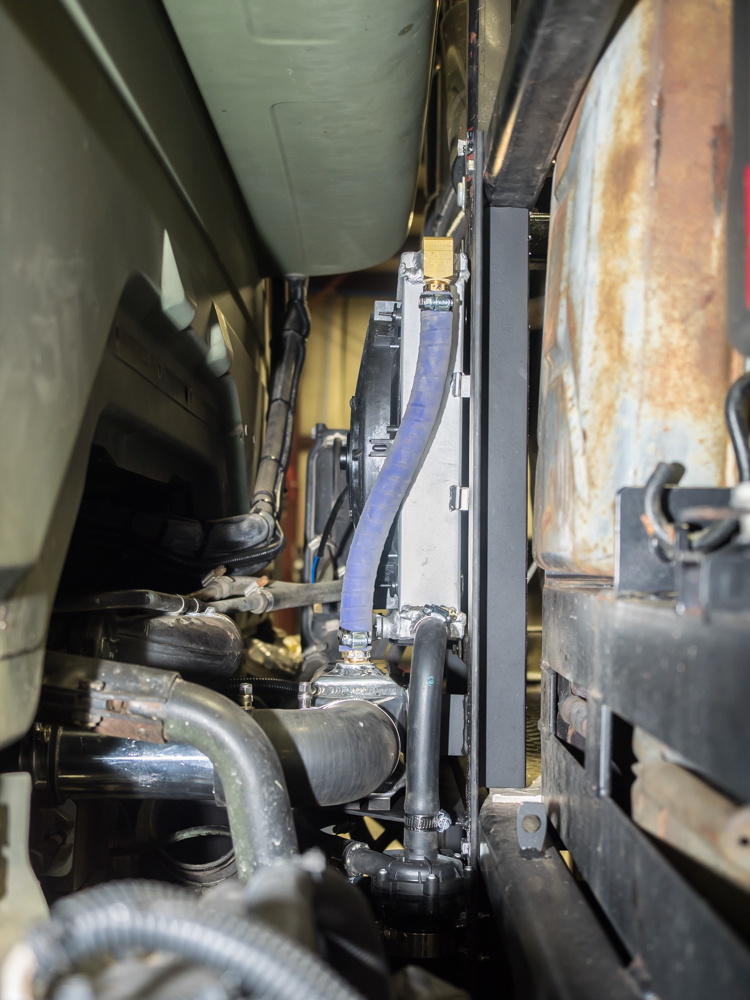
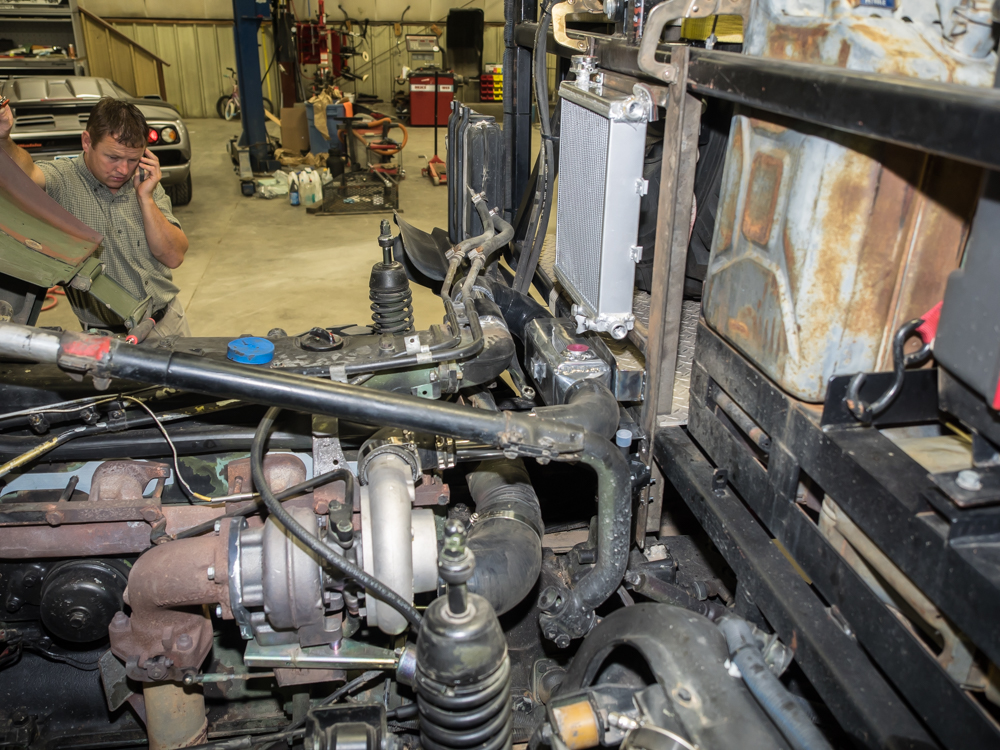
The
mounting frame was installed and the cab was lowered to perform
a final check on fit and clearance.
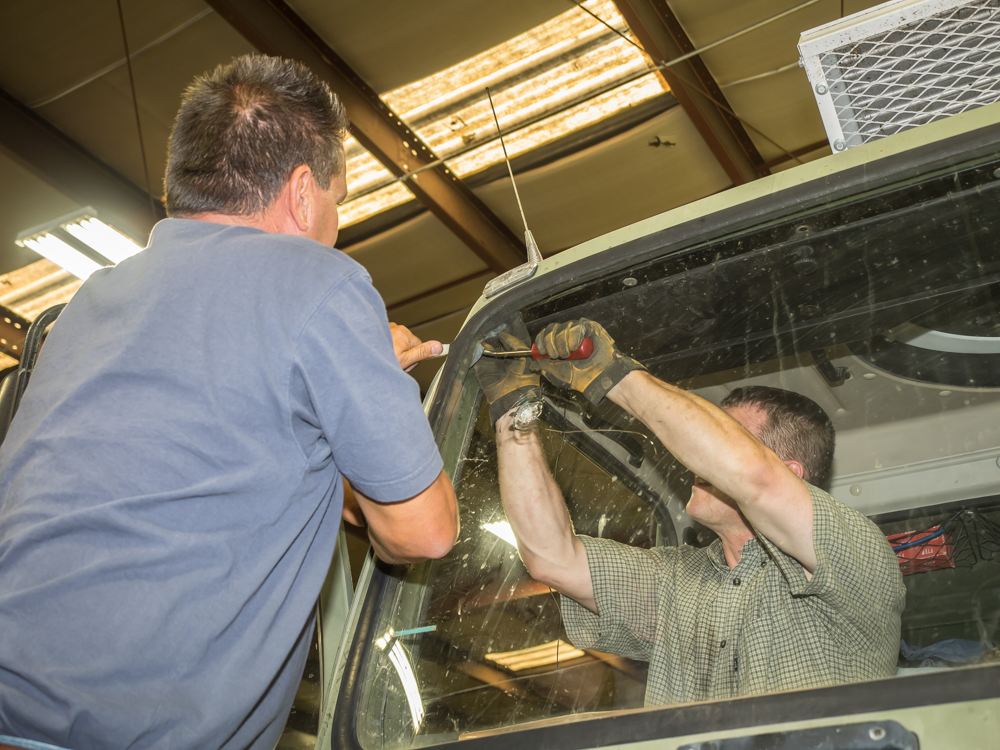
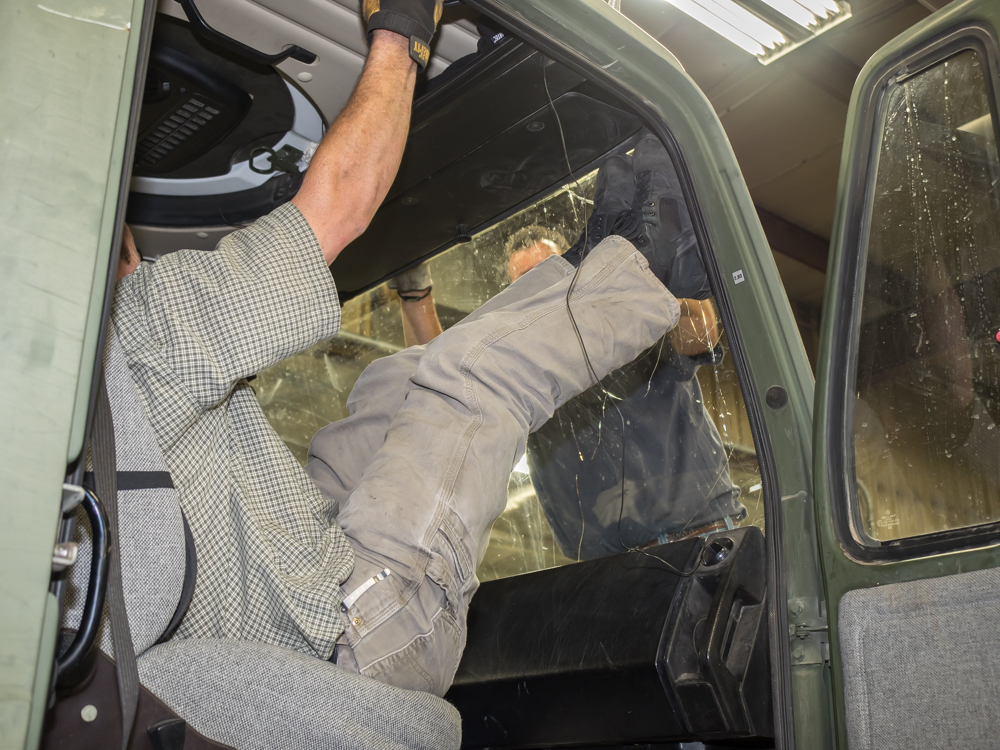
Next up
was the windshield. We had suffered a large stone strike
many months prior so Rob ordered the windshield for installation
on our next visit. The old rubber was actually in quite
good shape for being 25 years old, but it was stuck on both the
glass and the body. Getting it loose was hard.
Above, Scott and Rob pry the glass loose.
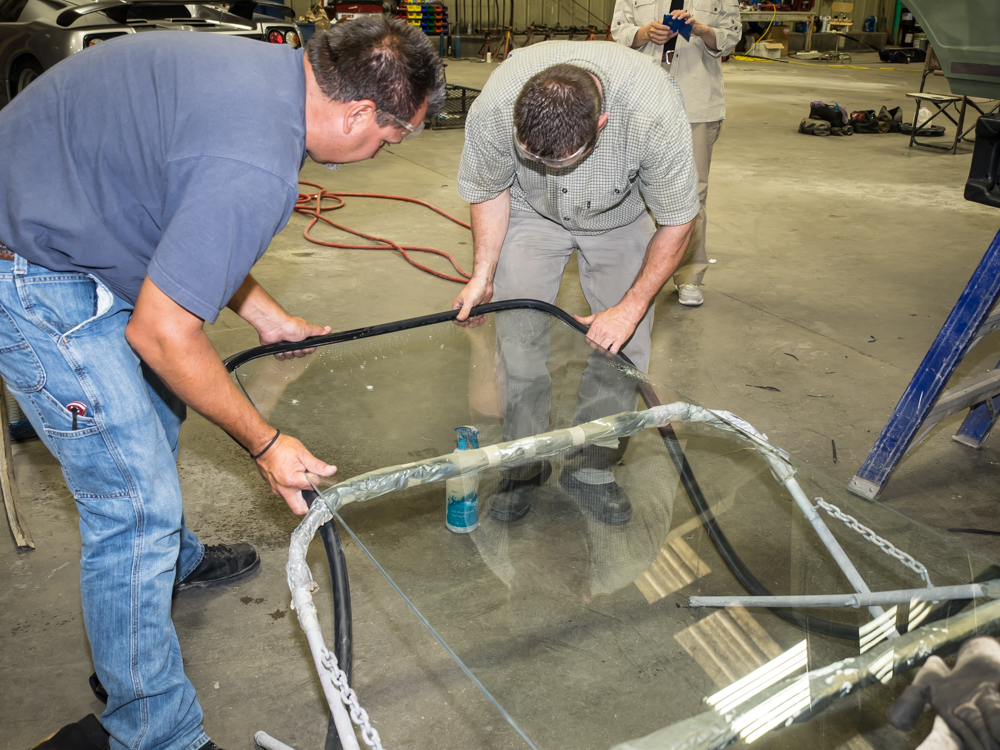
The
prying was not fully successful, so Rob resorted to using the
pressure from his feet.
Persistence
and effort finally prevailed and the old windshield was
removed. Next, the new gasket was checked to insure it
would fit.
The
gasket was installed on the new glass.
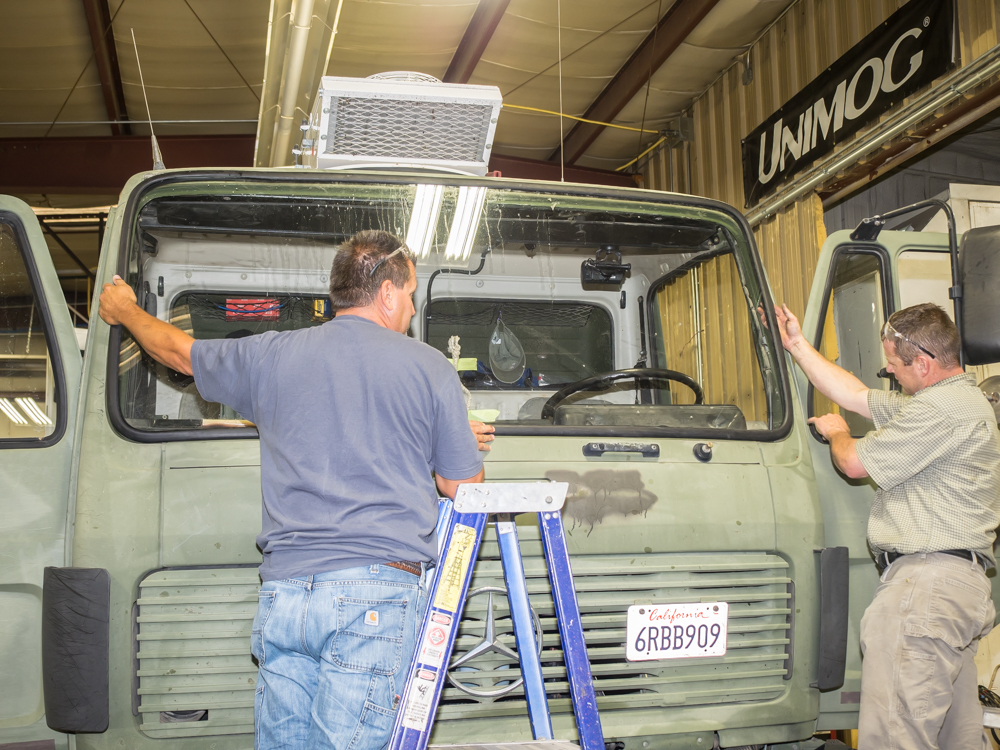
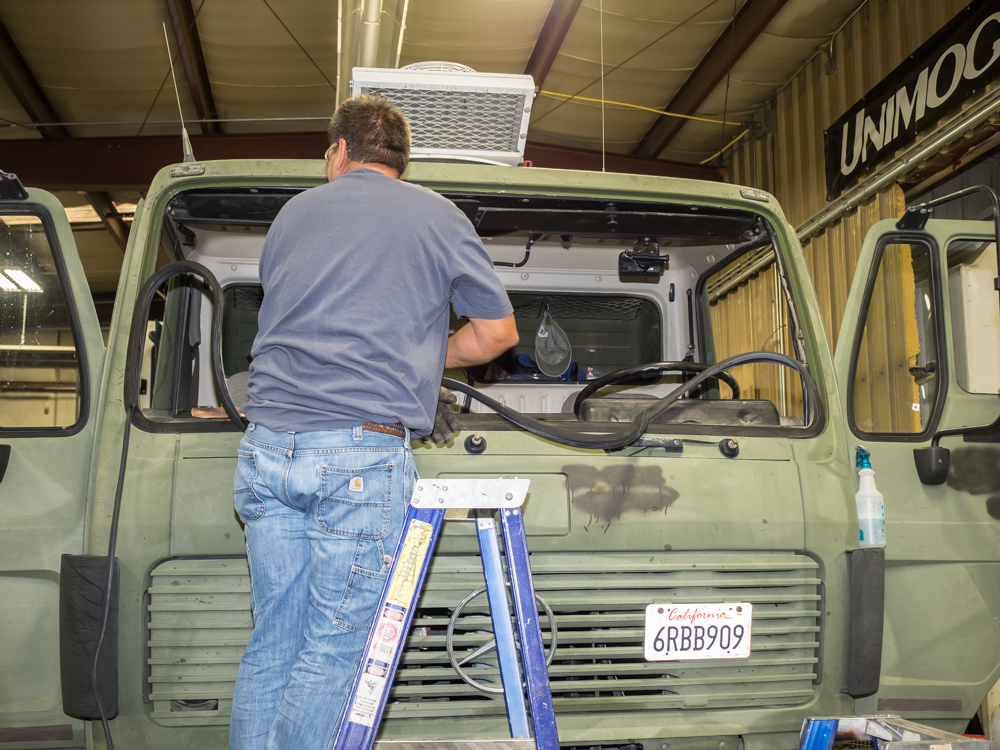
The
glass was "roped-in" to the frame, but it was ever-so-slightly
misaligned so it took quite awhile to fully seat.
In the
end, the manlift was brought out to allow us to more firmly
press on the windshield to get it installed.
We went
through several rounds of tuning to get the fuel delivery
adjusted to make better use of the new hardware. The fuel
delivery was increased, so care is required to insure that the
exhaust gas temperature stays within reasonable limits.
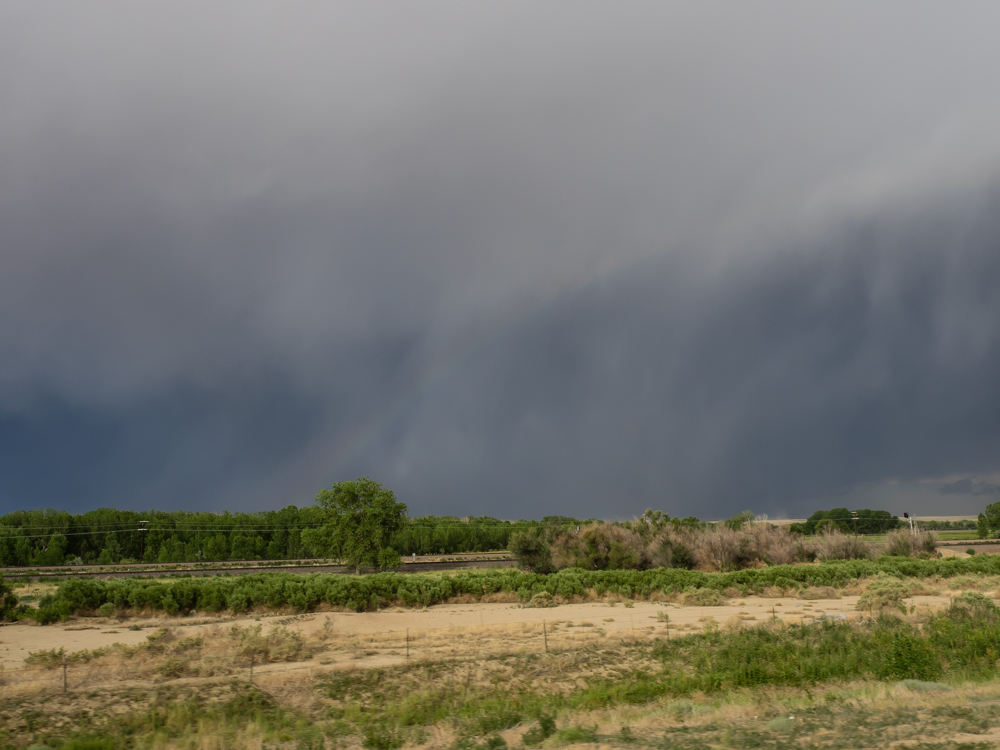
We
prepared to depart La Junta and then headed out toward Pueblo,
CO. Along the way, a line of thunderstorms crossed our
path.
We spent the night in Colorado Springs at a
convenient spot (AKA the KOA campground right next to the
freeway). Because of a variety of factors contributing to
the extended maintenance period, we ended up there on the 3rd of
July. The place was packed but we got lucky and got a
spot. We had a delightful dinner at Walter's Bistro and
then settled in for the night. The morning of the 4th we
broke camp and headed into Denver. We reached top speeds
of 65mph and exhaust temperatures peaked at 1300 degrees F on
the 7350 foot Monument Grade (AKA Palmer Divide) north of
Colorado Springs. The truck was running well and I was
pleased. My
fellow Unimogger Bob Ragain and his wife Kitty were in Denver
visiting relatives and were watching our progress on our SPOT
device. We contacted them and met up for lunch and then
continued north.
We decide to head toward Golden, CO to see if we
could find a place to stay for the night. Being the 4th,
everyplace was full except the Jefferson County Fairgrounds
which has a small set of RV spots. We went to the place
and checked in, then headed out to the store to get some
supplies.
En route to the store, the brakes locked-up.
We managed to pull into a 7-11 parking lot for a closer
look. A call to Rob, who was in New Mexico for the long
weekend, suggested that we should bleed the front brakes to
release the pressure. The design of the master cylinder on
the brakes was such that the front circuit engages before the
rear, so bleeding the front would likely remove the excessive
pressure and allow us to go on our way. Why, exactly, the
pressure was there was a bit of a mystery until we considered
the situation a bit more carefully later.
I jacked up the front axle in the parking lot and
checked to see if the front wheel would rotate -- No.
While the rear axle could be locked as well, the infrared
thermometer showed the front drums to be much hotter than the
rear drums. I bled the line on the front axle resulting in
an explosion of brake fluid and an unpleasant popping sound from
the rear of the truck. Once the bleed nipple was closed,
the front wheel could spin. And, when the parking brake
was released, the truck would roll backwards toward the street,
but TOTALLY WITHOUT ANY BRAKES. A measured re-application
of the parking brake brought us to a halt. I reasoned that
I had somehow I introduced air into the front circuit when they
were bled, but the rear circuit was non-functional as
well. In theory, aside from being actuated from the same
booster, the circuits are independent. The have separate
reservoirs, separate lines, etc. But, in this case,
something had happened to both circuits.
We attempted to bleed the front circuit, but with no
success. Depressing the brake pedal did not result in much
pressure in the lines but it DID migrate fluid from the front
reservoir to the rear reservoir, strongly suggesting a seal
issue in the master cylinder. Finally, after many tries
and the onset of both dusk and a rain squall, we decided that we
could not spend the night in the 7-11 parking lot. Since
we had already paid for a place and it was only a mile or so
away, we decided to risk a drive without any brakes. We
kept the speed below 20mph and use a careful application of the
parking brake to stop at intersections. The rain slick
streets were scary, but we only skidded once. Once we were
safely back at the Fairgrounds RV area, we set up for the night
and decided to attack the problem in the morning.
Kathleen had texted Bob about our predicament and he
offered to come to us to help. Next morning he and his son
in law came to assist. The short story is we were unable
to repair the problem. We pulled a vent plug on the
booster and blew out a bunch of rust particles. We built
air pressure and attempted to bleed the brakes but noted that
when the brake pedal was depressed, fluid moved from the front
reservoir to the rear reservoir but no hydraulic pressure was
achieved.
My current conjecture is that a particle of rust
initially obstructed the booster's ability to vent air pressure
when the brake pedal was released, thus causing a gradual
buildup of hydraulic pressure and later a lock-up. This
happened on my mog several times. The rapid release of
hydraulic pressure during the road-side bleeding process likely
caused damage to one or more seals in the master cylinder, thus
resulting in inability to build hydraulic pressure in the brake
lines and moving fluid from reservoir to reservoir. There
are other possibilities as well including the actuation cable
being mis-adjusted. But, at some level, the cause is
moot. The real issue is the ability to build and maintain
hydraulic pressure in the brakes.
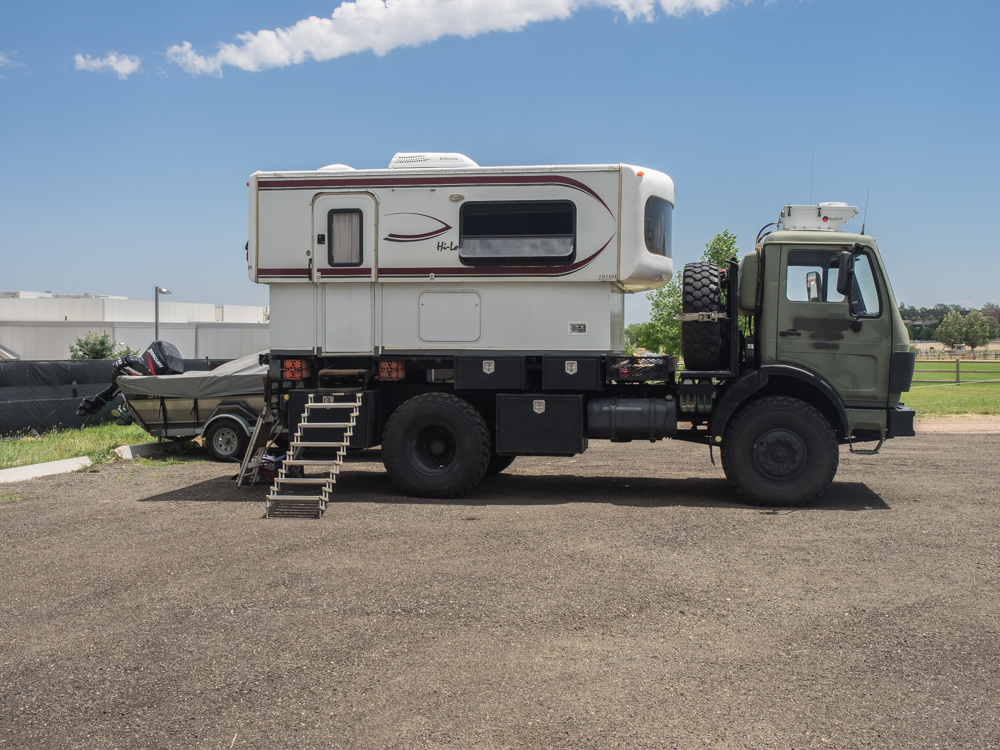
We
stayed one night at a regular RV spot with power and water and
then we were told that our site was reserved and we would have
to move, but with no service brakes, you are not going
far. We ended up on the other side of the parking lot with
no services. But, we did have access to the restroom and
showers so it was better than being in the parking lot of the
7-11.
| Previous Adventure | ||
| Trip Home Page |
Photos and Text Copyright Bill Caid 2014, all rights
reserved.
For your enjoyment only, not for commercial use.