Since our "series of unfortunate events" in southern Utah, I have become more fatalistic in my contingency planning. After we completed the repair of the Unimog's transmission mount, I spent a bunch of time thinking about what else could go wrong and what would be a "fatal" blow to a trip. Several things were discovered. First, was the fact that since I currently run Michelin XM-47 tires and have a camper mounted in the bed, a flat would force several hard decisions. Second, it was clear that I needed a holding device of some kind that would allow repair of heavy and/or unwieldy objects. Third, due to the camper being in the bed, I would have no room for any kind of escape device like a mountain bike.
The pictures below show the solutions to these issues.
The problem with big tires is that they are heavy. And really big tires are really heavy. The basic tire for my 1300L is the 14.5R20 which is a big tire. But, to allow deep sand operation, even bigger tires are needed. For the past 5 years I have been running Michelin XM-47s. These work great off road, but the problem is that once the camper was installed, there is no place to stow a dead tire in the event of a flat. I use the stock spare tire mount in my truck and it easily stores the 14.5R20s. But, the XMs are way too wide to be stored in that rack. So, if a flat occurs, using the 14.5s for a spare is fine, but without a place to stow the dead tire, I would have to abandon it. And, unless I was willing to de-mount the tire, I would have to abandon the rim as well.This would be both costly and wasteful. Before the camper was installed, the dead tire would just be hoisted into the bed using the canopy hoops and a come-along. But, after the camper was mounted, there is no place to store the dead tire.
I built a very strong steel basket for the back of the truck to store extra cargo when the camper is mounted. The initial concept was to use the storage for my cooler and fire wood. The basket is plenty robust enough to hold the tire, but the problem is how do you get an awkward, 300 pound tire into the basket? Particularly if you are in rough terrain and the truck is off-camber.
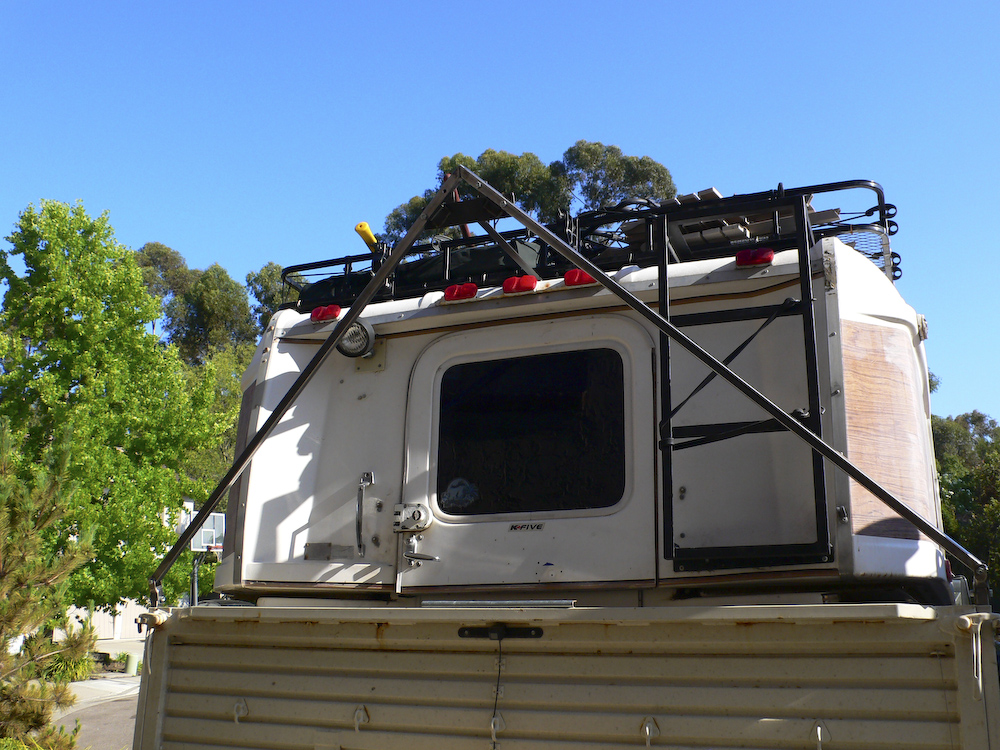
The plan was to design a crane that would be easy to assemble and disassemble. The geometry of the back of the truck and basket is such that to make this work and provide reliable support for the 300+ pound tire and wheel would require a pretty beefy frame. The frame will need to connect to the camper to provide the necessary bracing and to offset the "moments" generated by the weight of the tire. Due to these requirements, it was clear that the crane could only be used when the camper was down and in the travel configuration. Stated differently, if you want to raise the camper, the crane frame would have to be detached. Also, the XMs are big enough that when they are in the basket, you cannot lower the tailgate and therefore access to the inside of the camper is blocked. So, this means that the dead tire would have to be unloaded before access to the camper would be possible and then loaded again the following morning. Not ideal, but potentially practical if the crane assembly and disassembly were easy enough.
After thinking about all the constraints, I came up with a design that would be both strong and easy to manipulate. The only real constraint was that due to the weight of the tire, the rear tailgate would have to be up and locked before lifting could occur. The plan was to have 2 inserts that would be placed into the existing bed sides. Attached to the inserts would be U joints connected to the crane masts, with one mast for each side meeting in an "A". The masts would be bolted together with a plate that would provide both the lifting point and a connection to the roof rack that would provide the offsetting force to the load. The connection is a simple tension member and would be stowed with bolts onto the existing roof rack. The masts would stow on top of the bed sides by having them rest on a saddle. The plate would also be stowed on the rack.
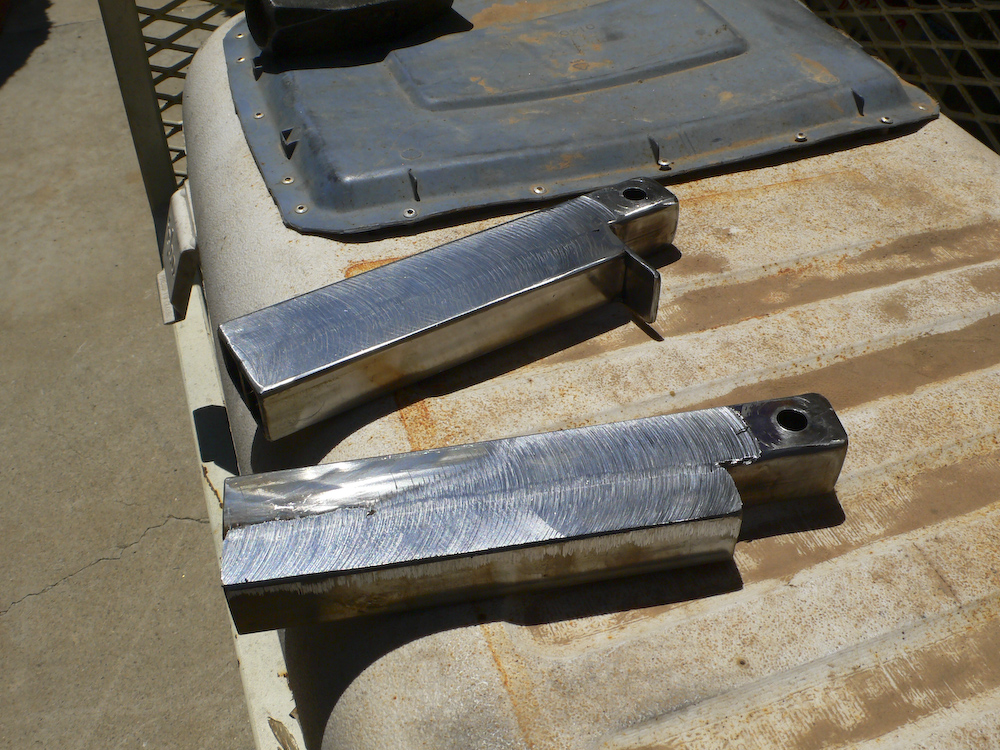
The inserts that will connect the masts to the bed sides. The back one is completed, the front one lacks the top tab. Note that the faces of the inserts were milled to achieve the correct thickness to provide a mild interference fit. Thanks to Mark Mitchell for assisting me in this process.
The U joints were made out of a short section of 3mm wall square tubing and 4 pre-fabricated, pre-punched "gate tabs".
The masts were about 1.54 meters of 3mm x 25mm square tubing. Above, you can see that the insert has been pounded into the bed side.
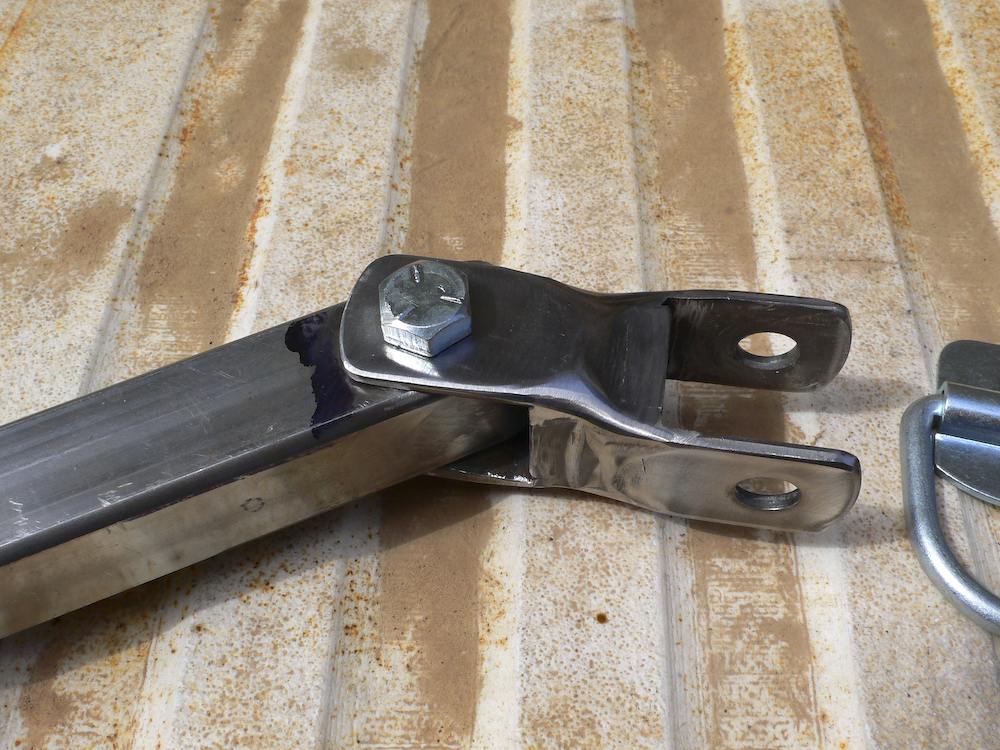
The top connection plate was made from some scrap 1/4" plate that Mark had in his shop. The angle was welded prevent it from rotating during the mounting process. The large D ring was added to provide a strong and flexible lift point.
Above, you can see the tension member has been added. This member is 1x1 angle and connects to the mounting frame of the roof rack.
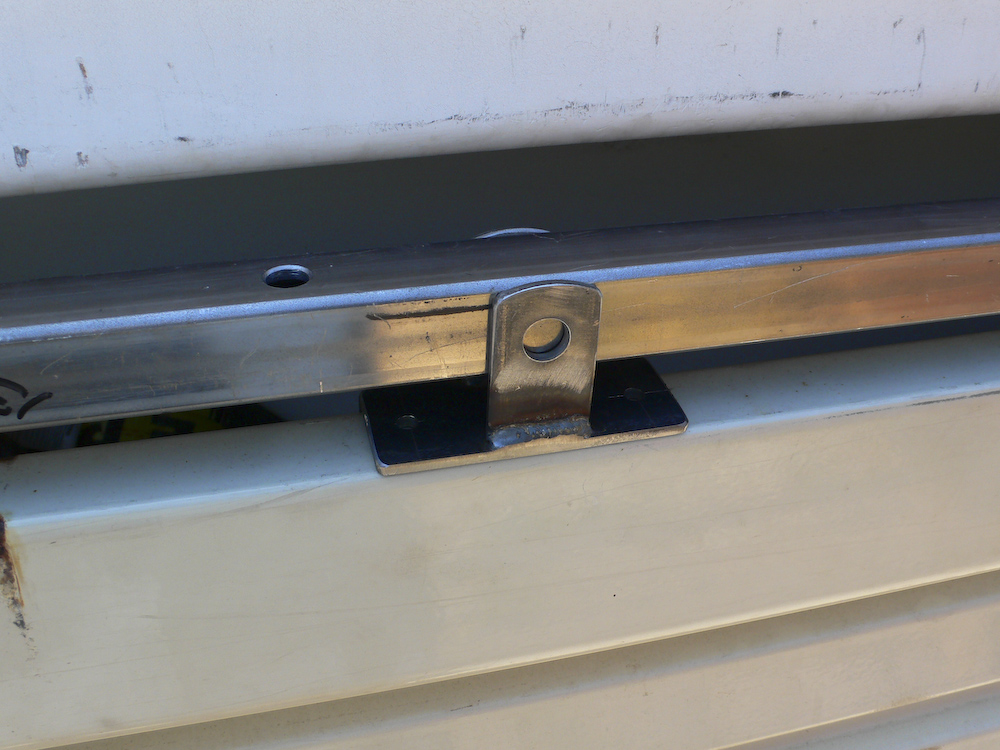
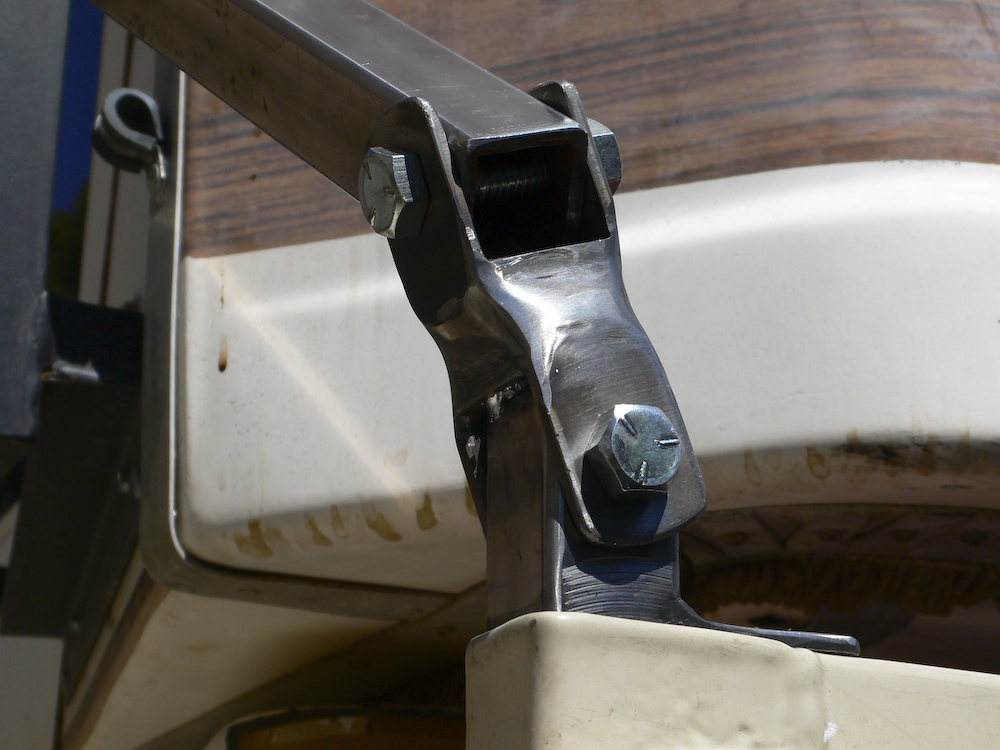
The mounting saddles will fit on the bed sides. Above, the holes in the mast have not yet been drilled and it is being fitted. The saddles will be connected to the bed with 3/16" pop rivets. Ball-lock pins will hold the mast in place.
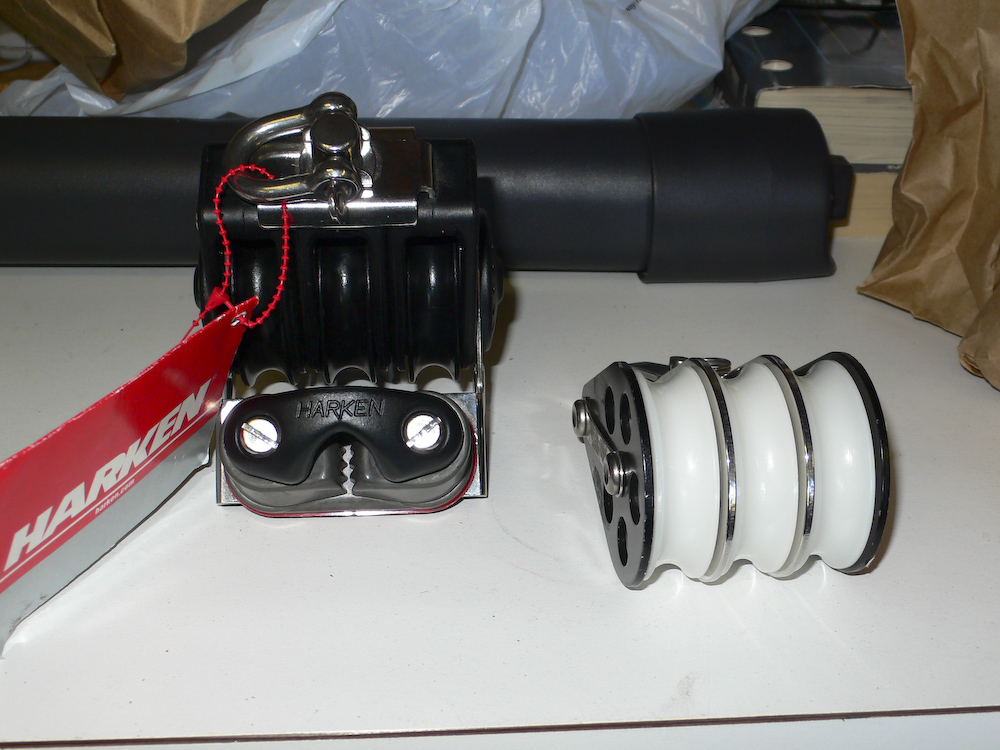
The real issue is how you lift the tire. As you may recall, due to Mark's suggestion for the camper, I used marine grade components in the truck. The same place, West Marine, came to my rescue this time. Mark uses a simple 6:1 block and tackle to lift cargo into his truck. The idea was sound, so I planned to use the same. But, these components were not cheap!! The 2 items above plus some low-stretch rope was $285. The photo above was taken before I assembled the block. One of the trick features of this block is that it has a cam cleat that locks the rope so you do not have to pull on the line all the time. This cam assembly is at the bottom of the left component.
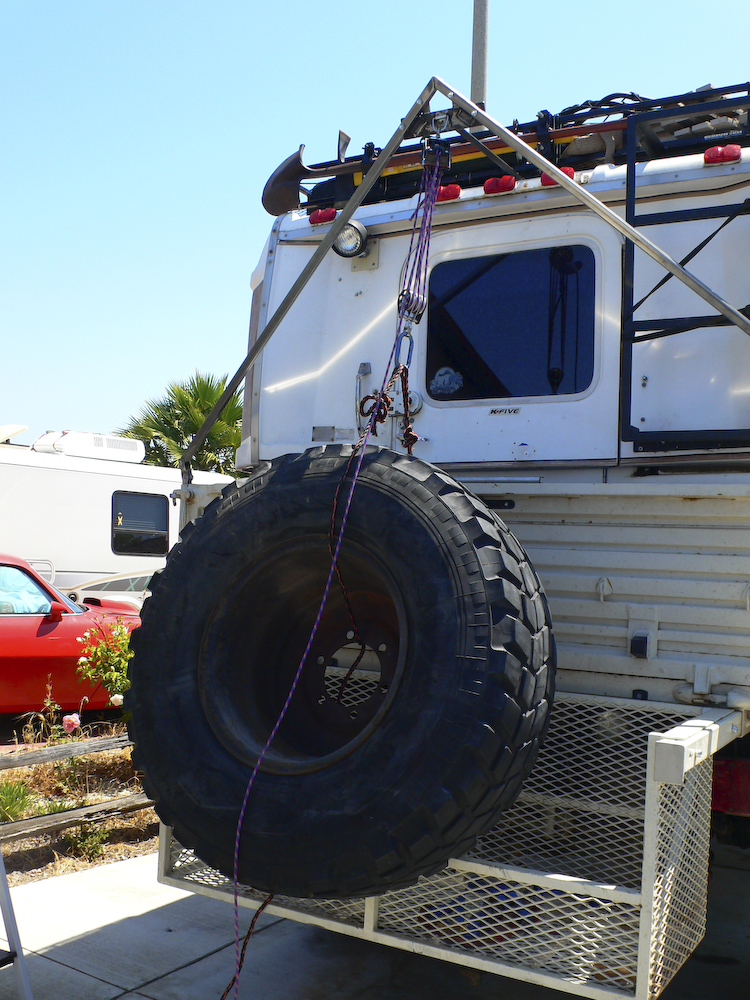
First lift test. I used a regular 14.5R20 tire as ballast reasoning that if it could lift that easily, it could also lift a somewhat bulkier XM-47. One of my requirements was that I could do this alone, without assistance. I ran that test several times, and even lifted the tire with one hand.
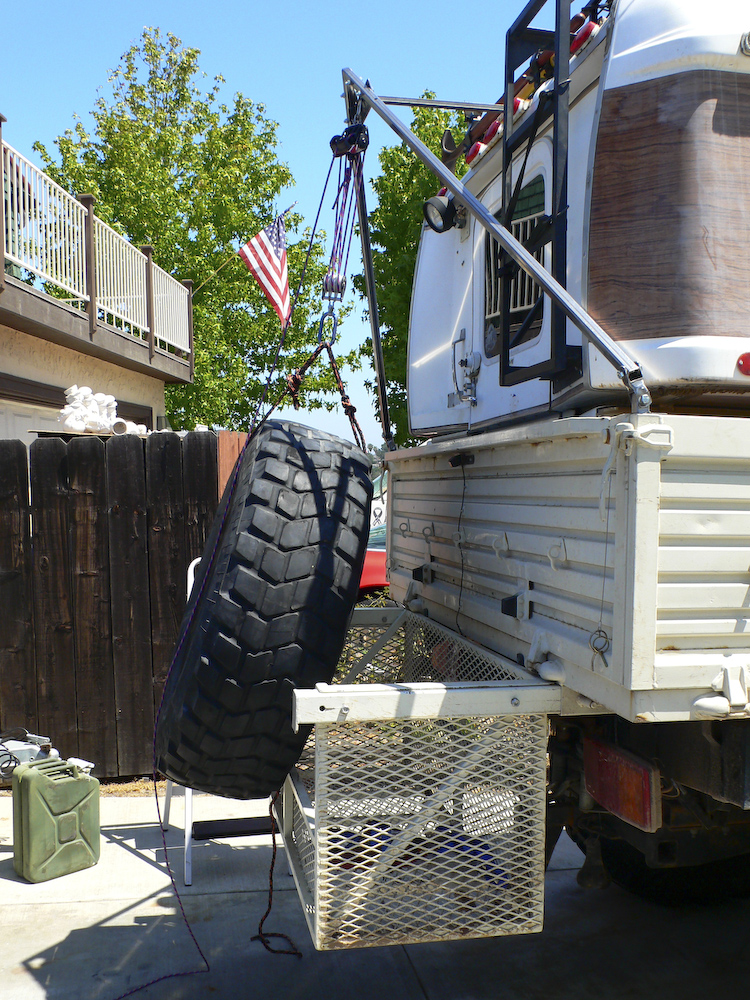
I designed the crane so the lift point would be over the center of the basket. That way, the tire would naturally swing into the basket and the swing would be blocked by the rear tail gate. To remove the tire, you have to swing it out over the edge of the basket. But, if you have extra line on the lifting strap, it becomes easy.
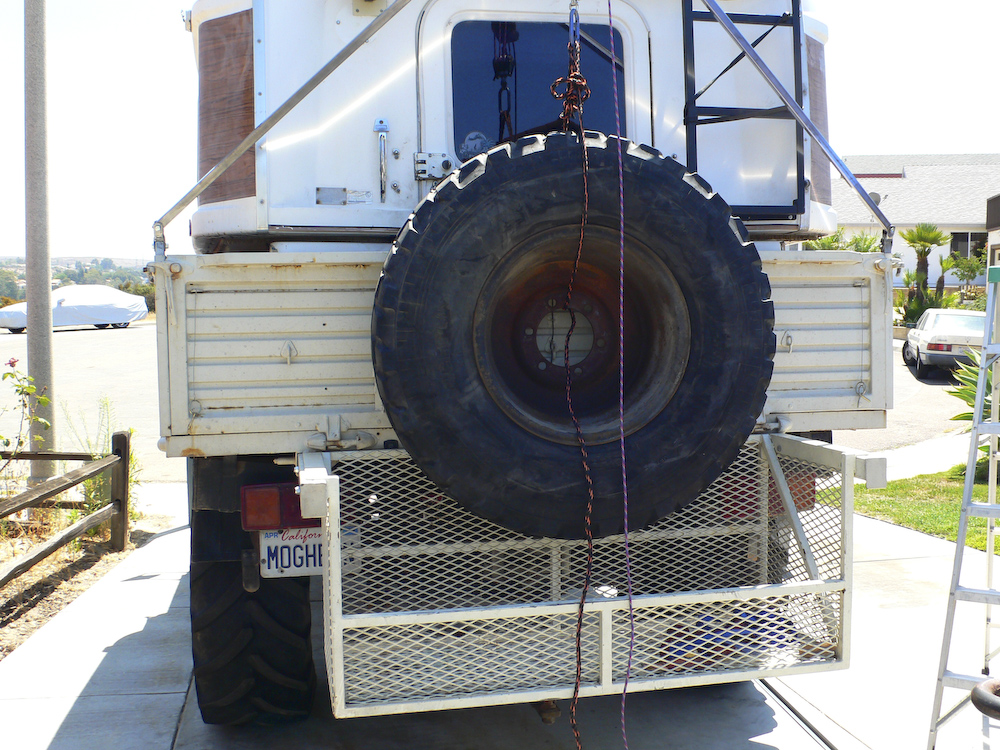
Maximum lift height is constrained by the minimum length of the block assembly. Look at the reflection in the mirror and you can see that the components are quite close to each other.

A close-up of the block assembly. Note the rope in the cam cleat. Also, you can see the tension member just to the left of center in the photo. It is connected to the roof rack mounting frame. Once this test was complete, the parts were disassembled so they could be primed and painted. Once the paint is dry, the saddles will be affixed and the whole crane will be reassembled "for real".
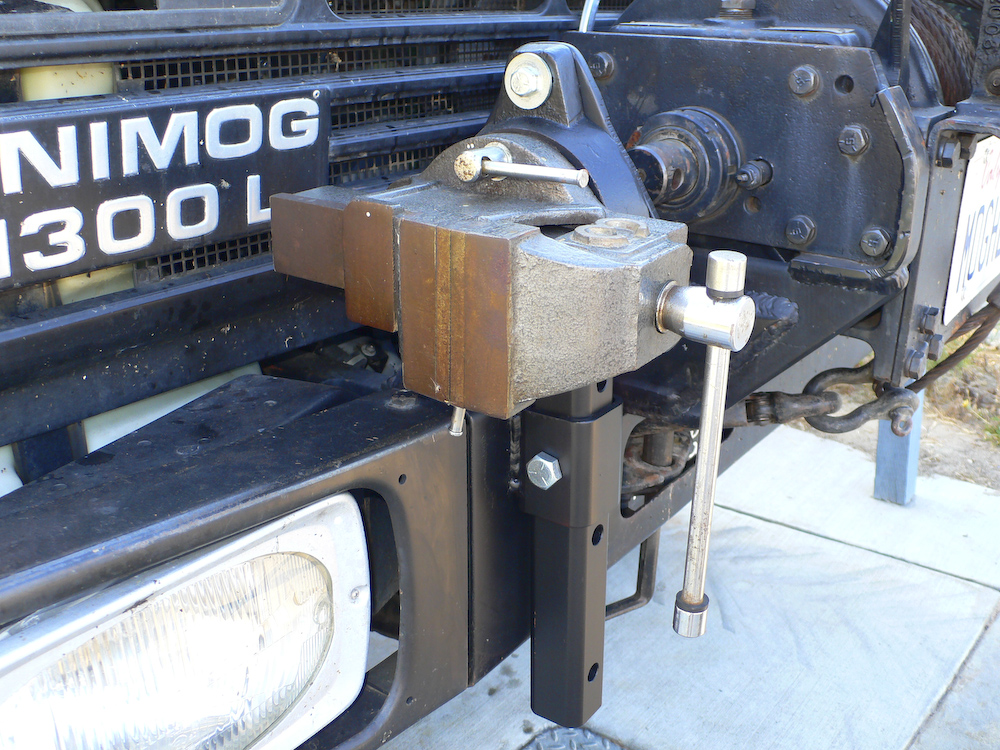
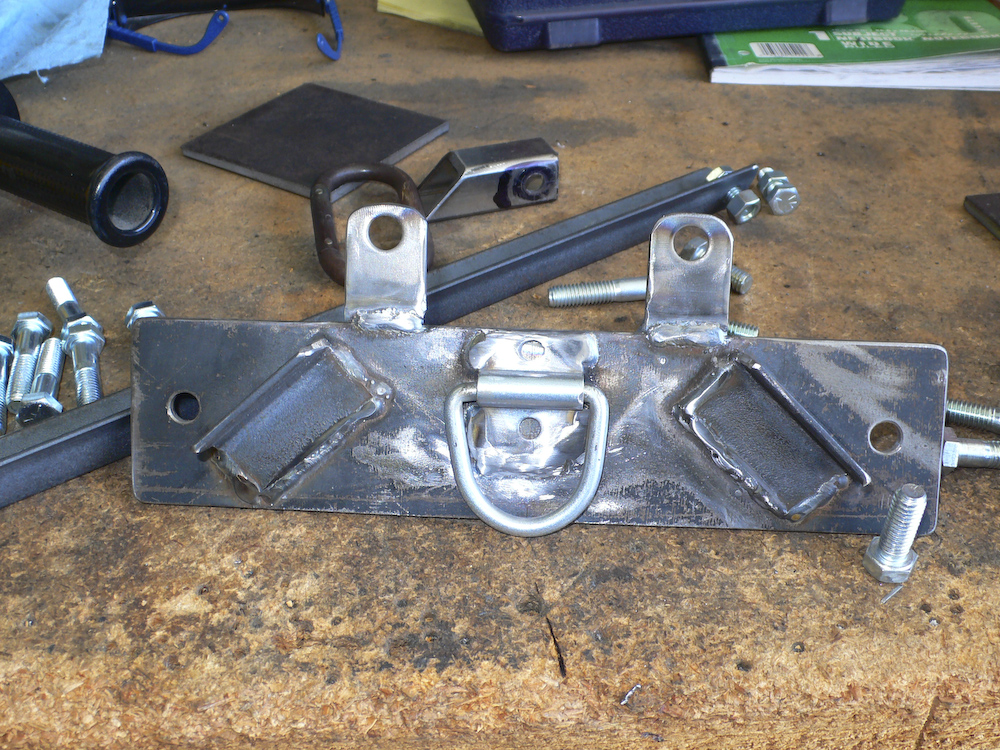
To address the need for a holding fixture for repairs, I decided to use a spare vice that I had in my garage. I went to the steel store and bought some trailer hitch components and some 3/8" steel plate. Mark was kind enough to lend me his cutting torch and drill some holes in the plate and tubing. The outer sleeve was then welded to the front of the bumper with careful attention to allowing the bumper fascia to be removed if required. In the current location, the vice is usable as-is, but another mount is needed to allow use for normal operations.
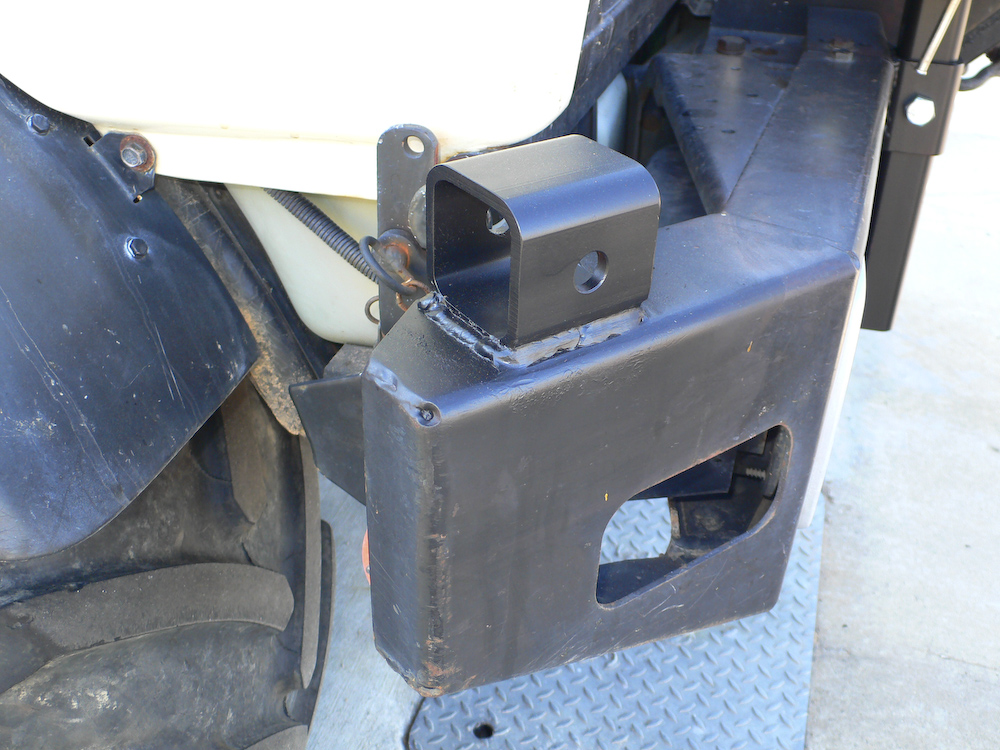
I took another small section of the 2 1/2" 1/4" wall tubing and welded it to the end of the front bumper. This allows me to easily move the vice to the alternate location. Plus, since the vice is on normal trailer hitch tubing, it can be plugged into another vehicle if required.
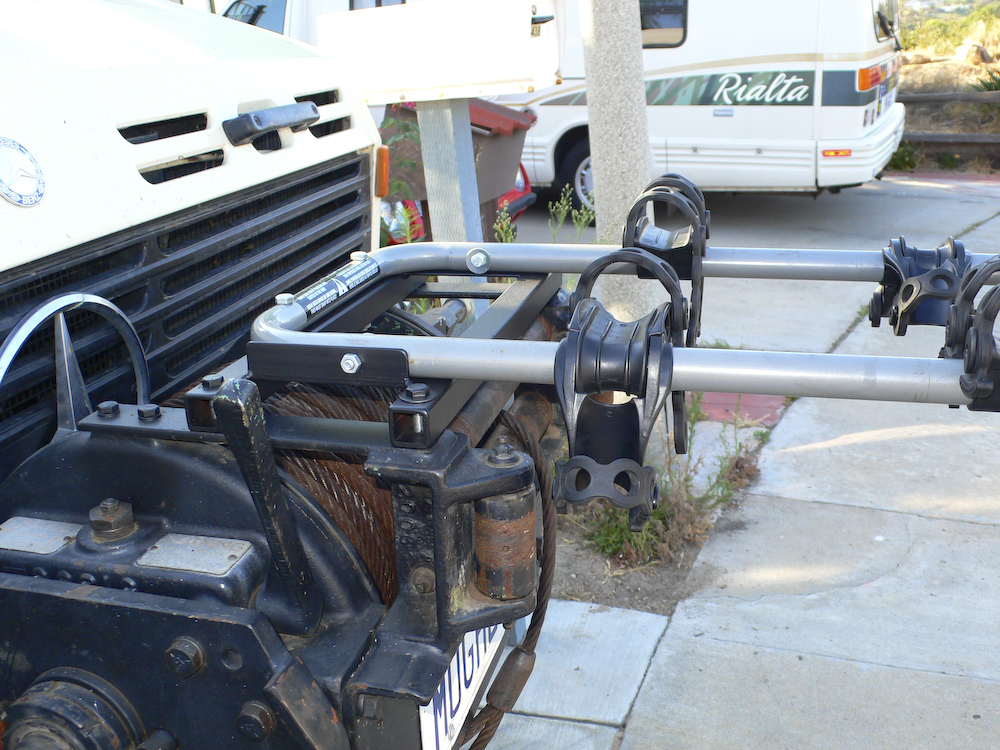
To provide an easy and secure mount for mountain bikes, I cannibalized Kathleen's Yakima rack that she used (once) on her 330 BMW. Then, I welded up a small mounting point that hooks to the front winch. The gray tubing is easily removable by taking out 4 bolts. The balance of the setup is more permanently attached and was not intended to be removed.
This was a ton of work to do these 3 mounts. But, we now have the peace of mind that should we need them, we will have them available. We have used the bike rack already on a beach cruise. I am totally OK if the other 2 devices are never used. Particularly the crane since its use implies one of the XM-47s has gone south and changing one of those is a ton of hot, dirty work.
Text and photos Copyright Bill Caid 2008. All rights reserved.